
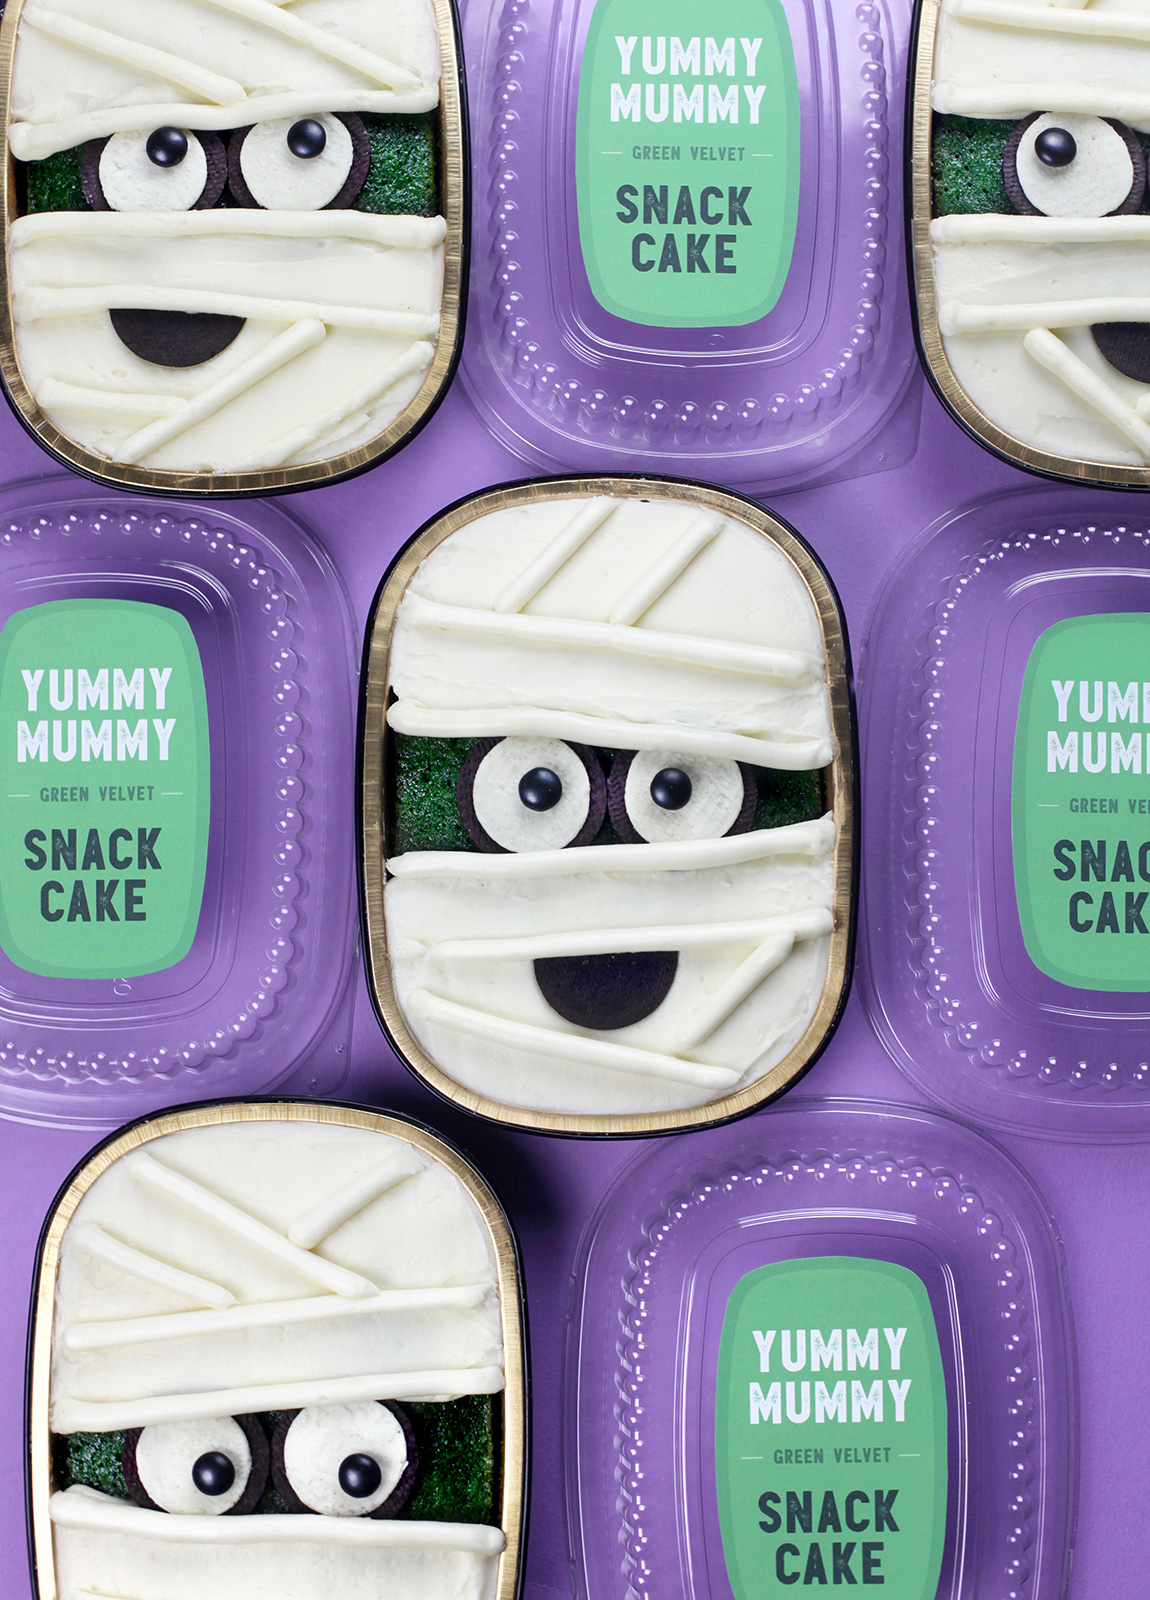
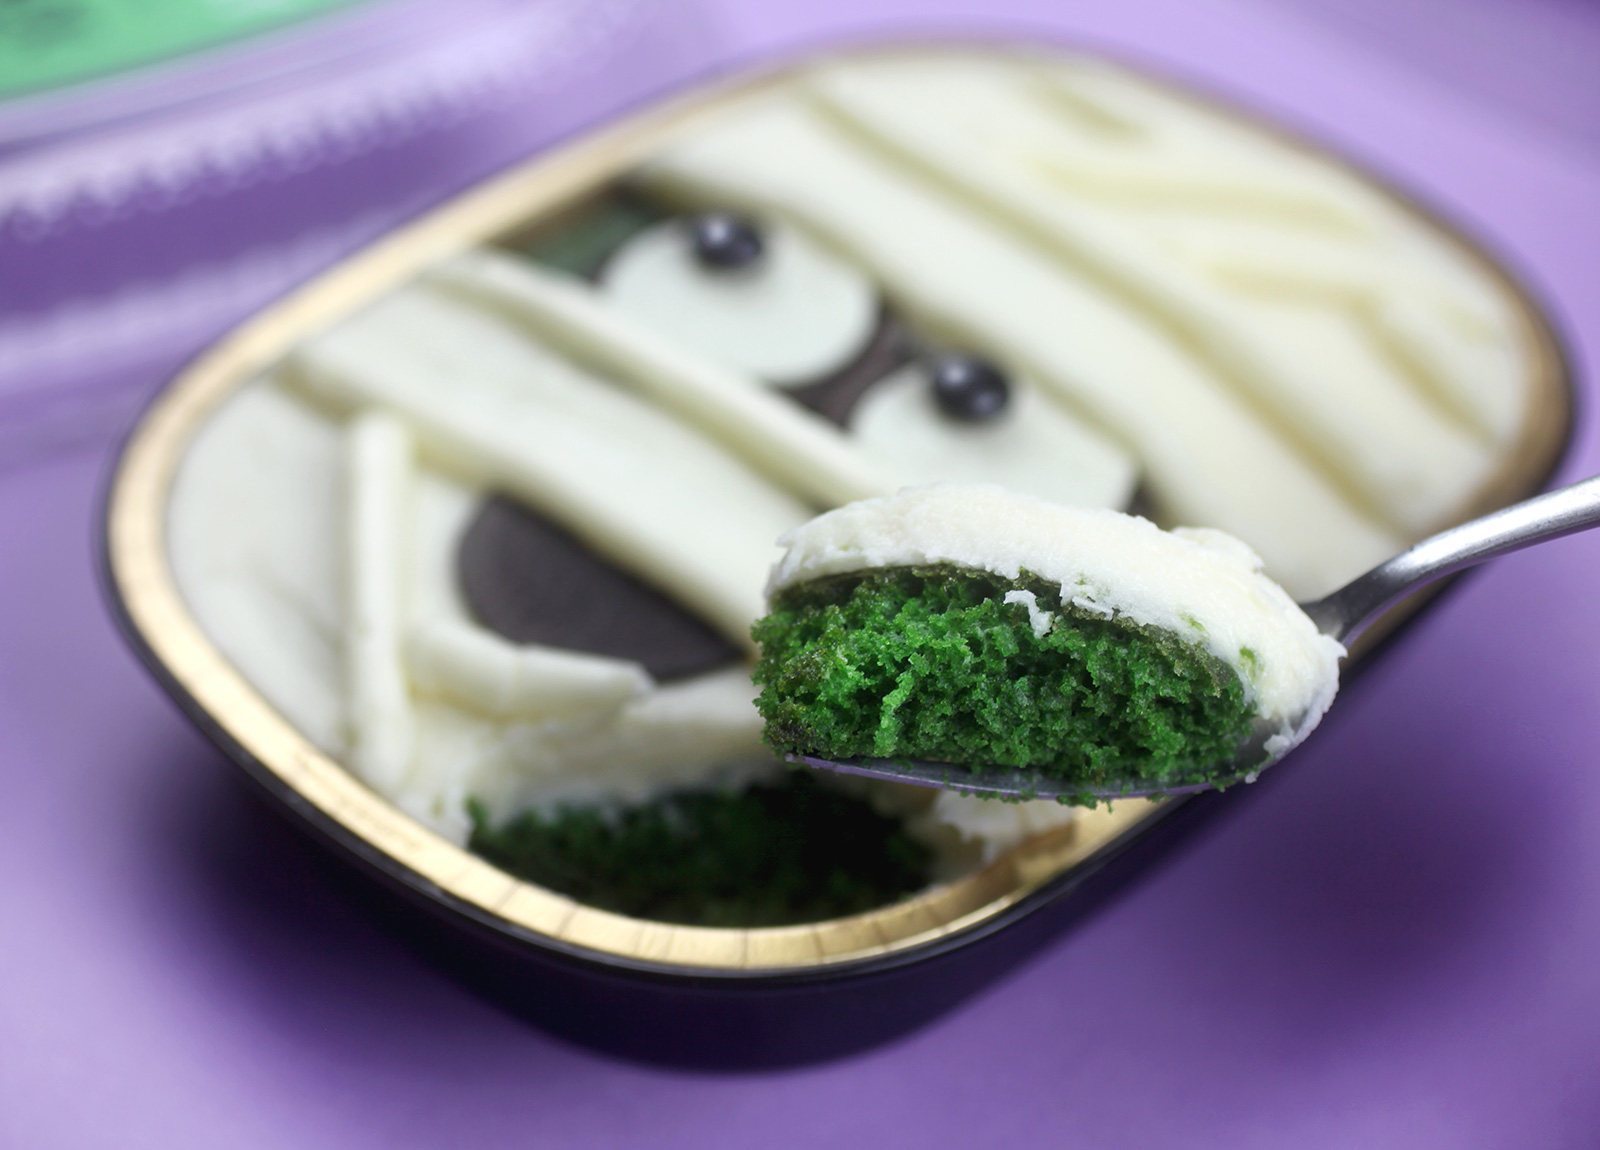
Halloween is almost here and I couldn’t resist making and decorating spooky cute snack cakes to get in the mood. I’ve been wanting to try one of my cake recipes to bake in these individual foil baking containers to see how many cakes it would yield. So I used my red velvet cake recipe (turned green, of course) for the mummy faces and then decorated them as simply as I could for a pretty fun and easy individual treat.
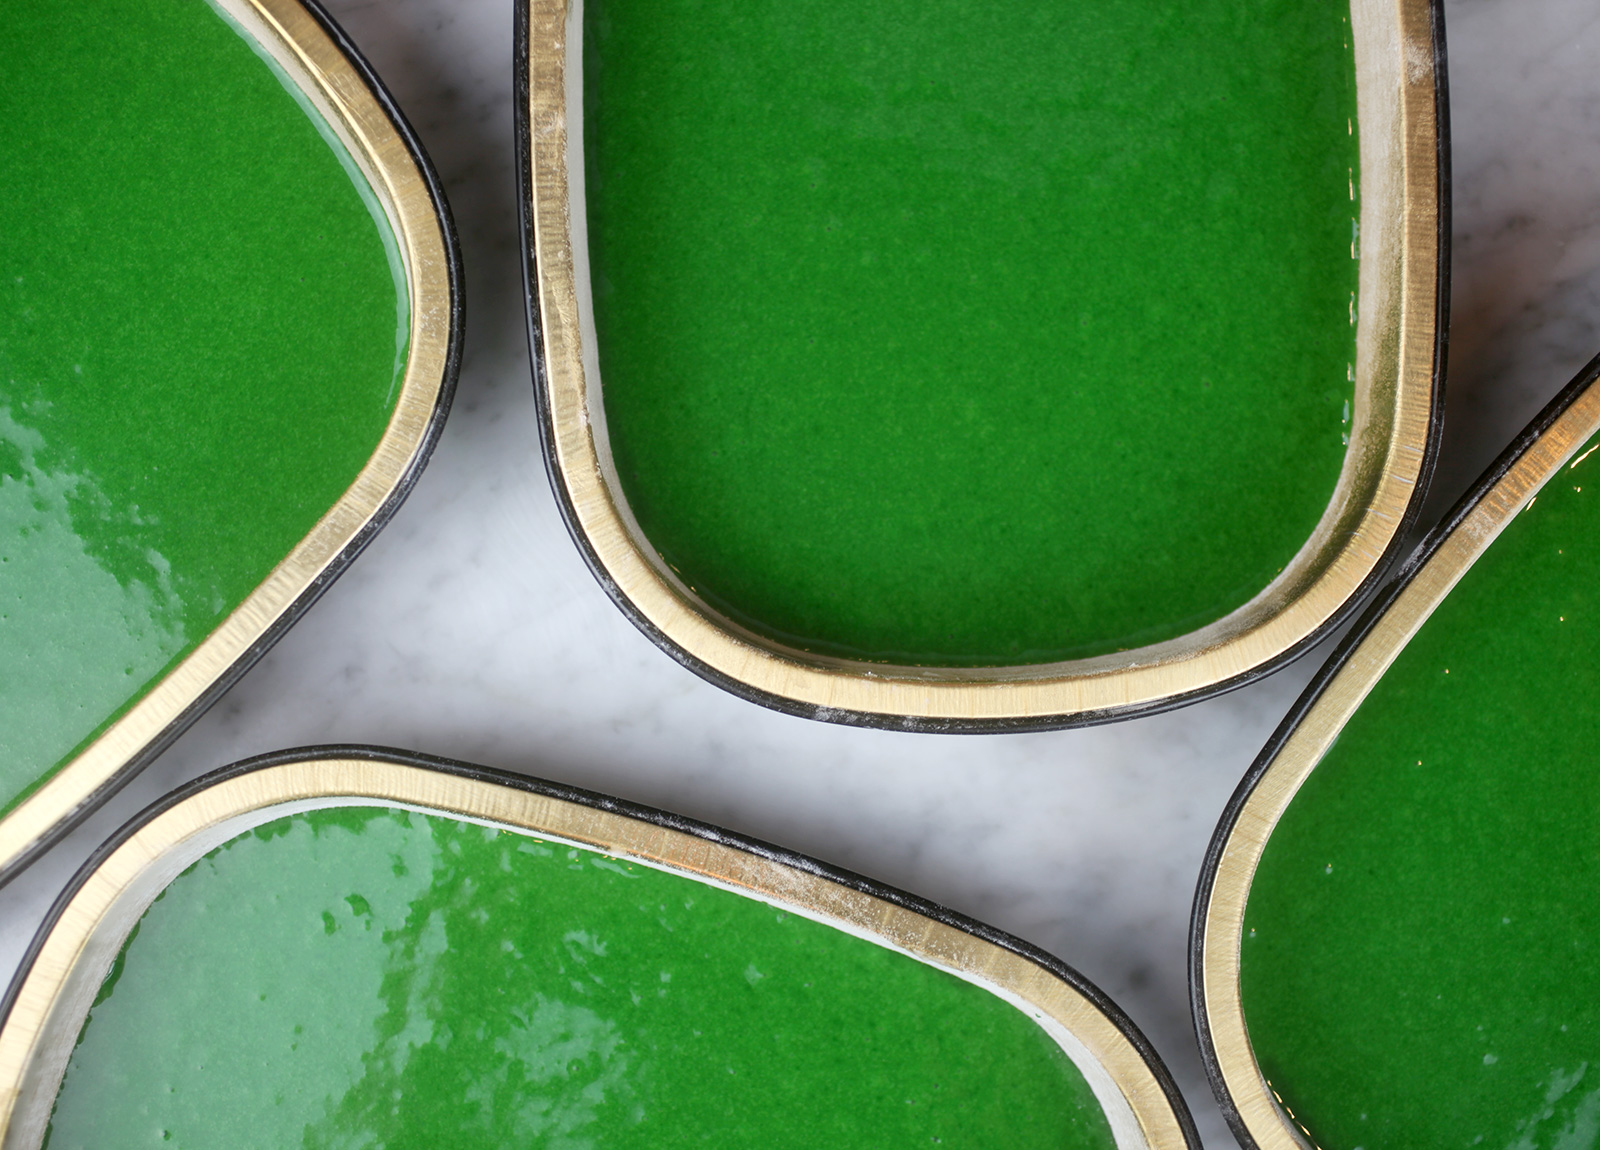
Green velvet cake batter. Not the most appealing in general, but it definitely works for this project. I like the green for these because it allows a hint of the color to show for the mummy faces. Now, if I were decorating these and covering the cake completely with frosting, I’d just stick with regular red velvet, you know.
The recipe yields four snack cakes using these cute containers. So… pretty good for gifting.
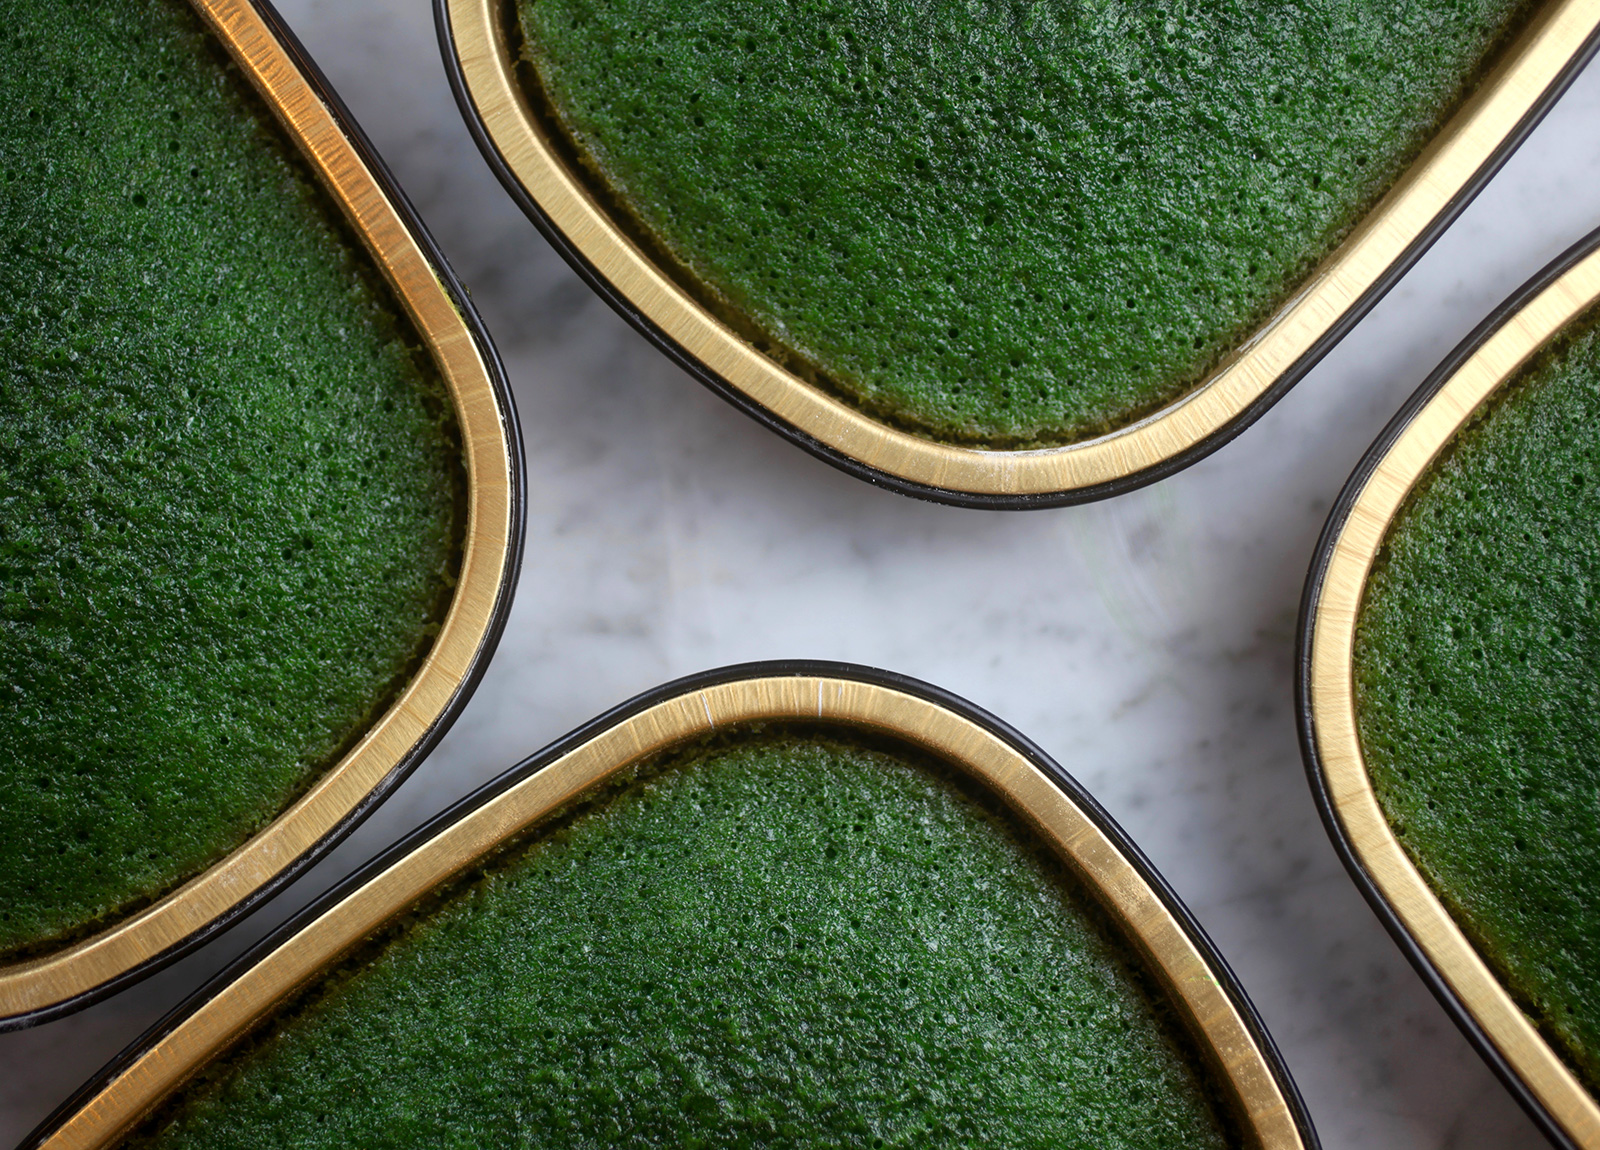
All baked and ready for their close up.
Sidenote: I’m happy to know my red velvet cake recipe will also make four little snack cakes. Happy to start planning for the holidays.
Now let’s decorate.
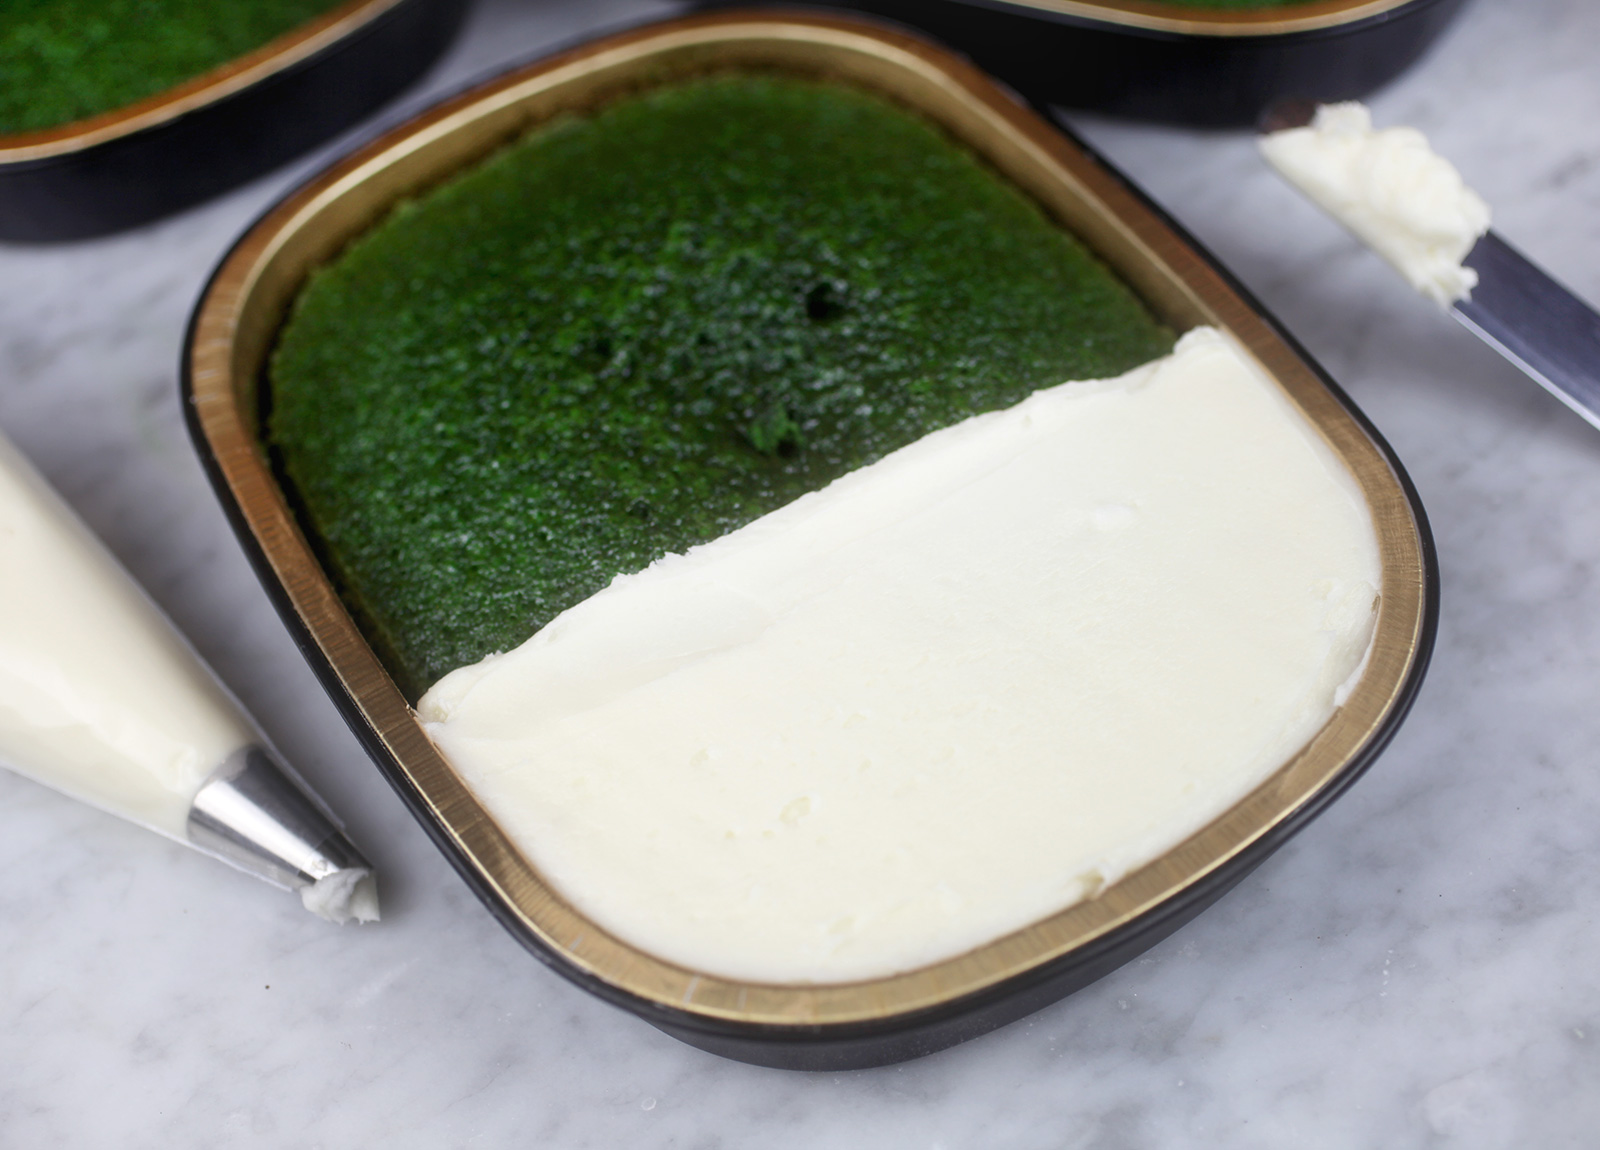
First up, frost a large portion of the bottom and top of the cake leaving the green cake exposed in the middle for the mummy’s face.
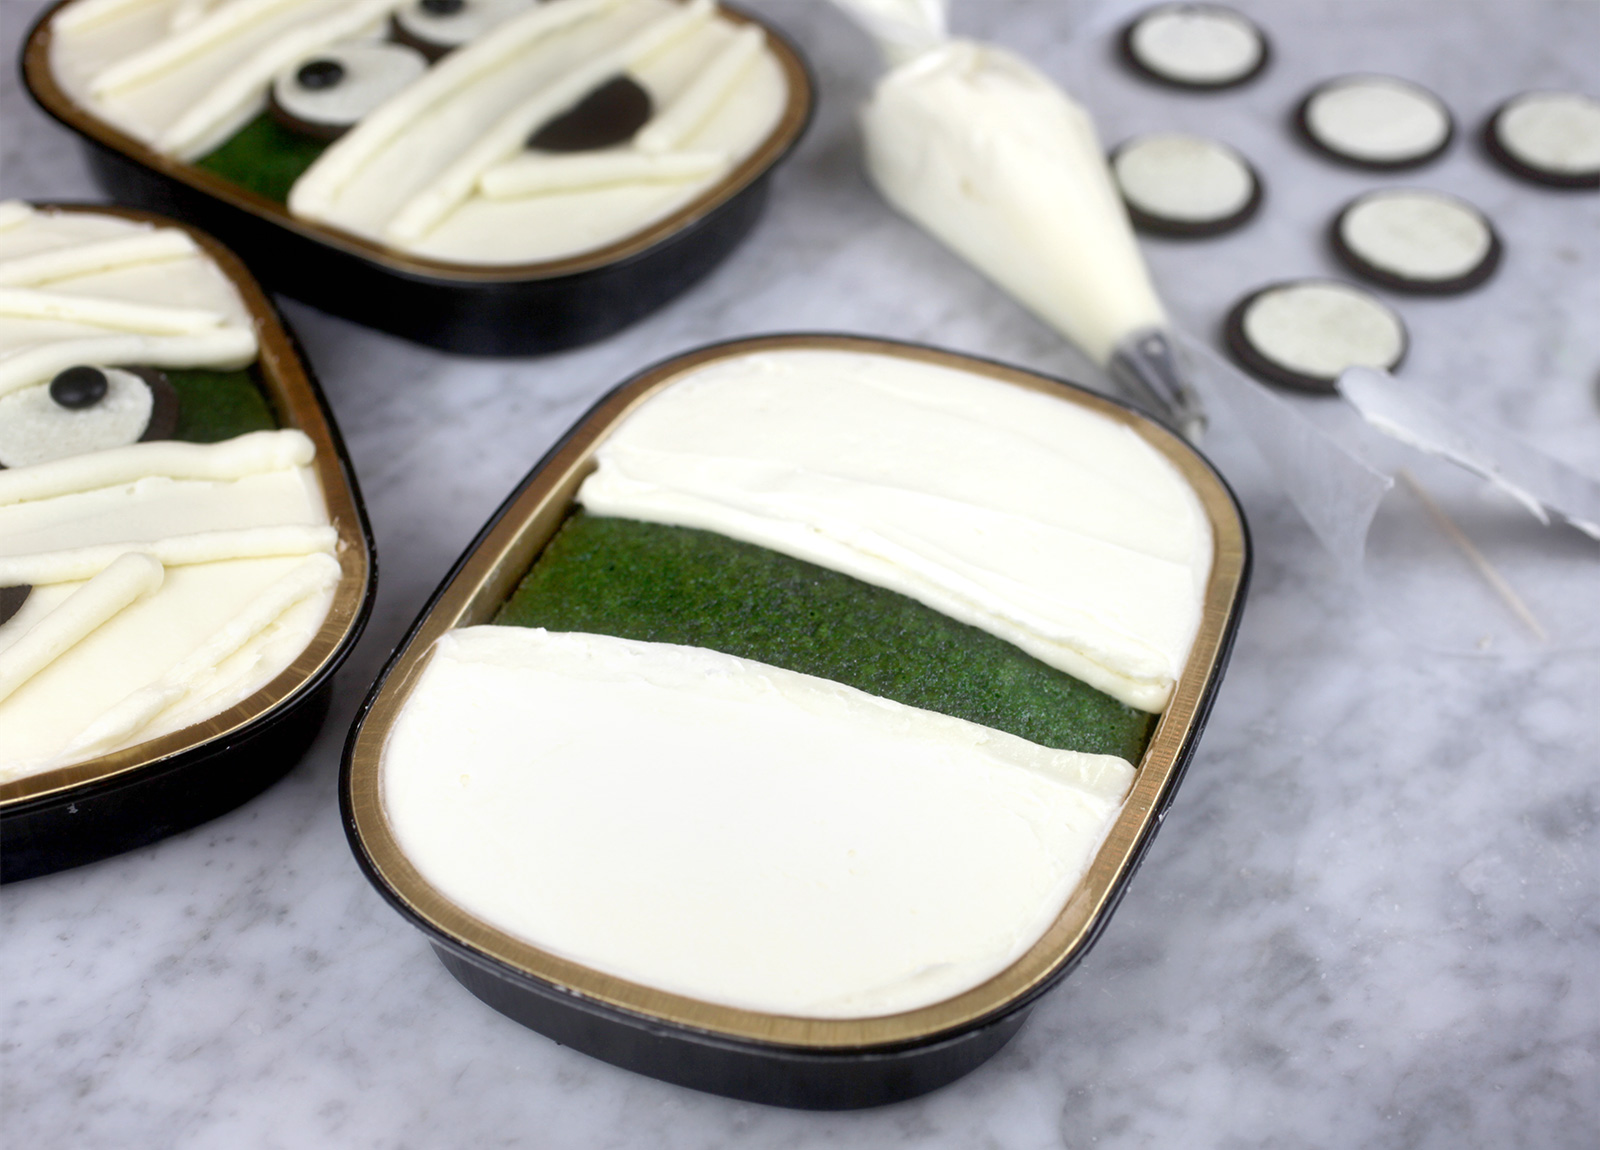
You can pipe a line of frosting to use as a border and then fill in the shape using an offset spatula for a smooth surface. You’ll get frosting on the edge of the container, but no worries – it will wipe off easily.
Once you have the top and bottom areas frosted, you’ll need some big eyes.
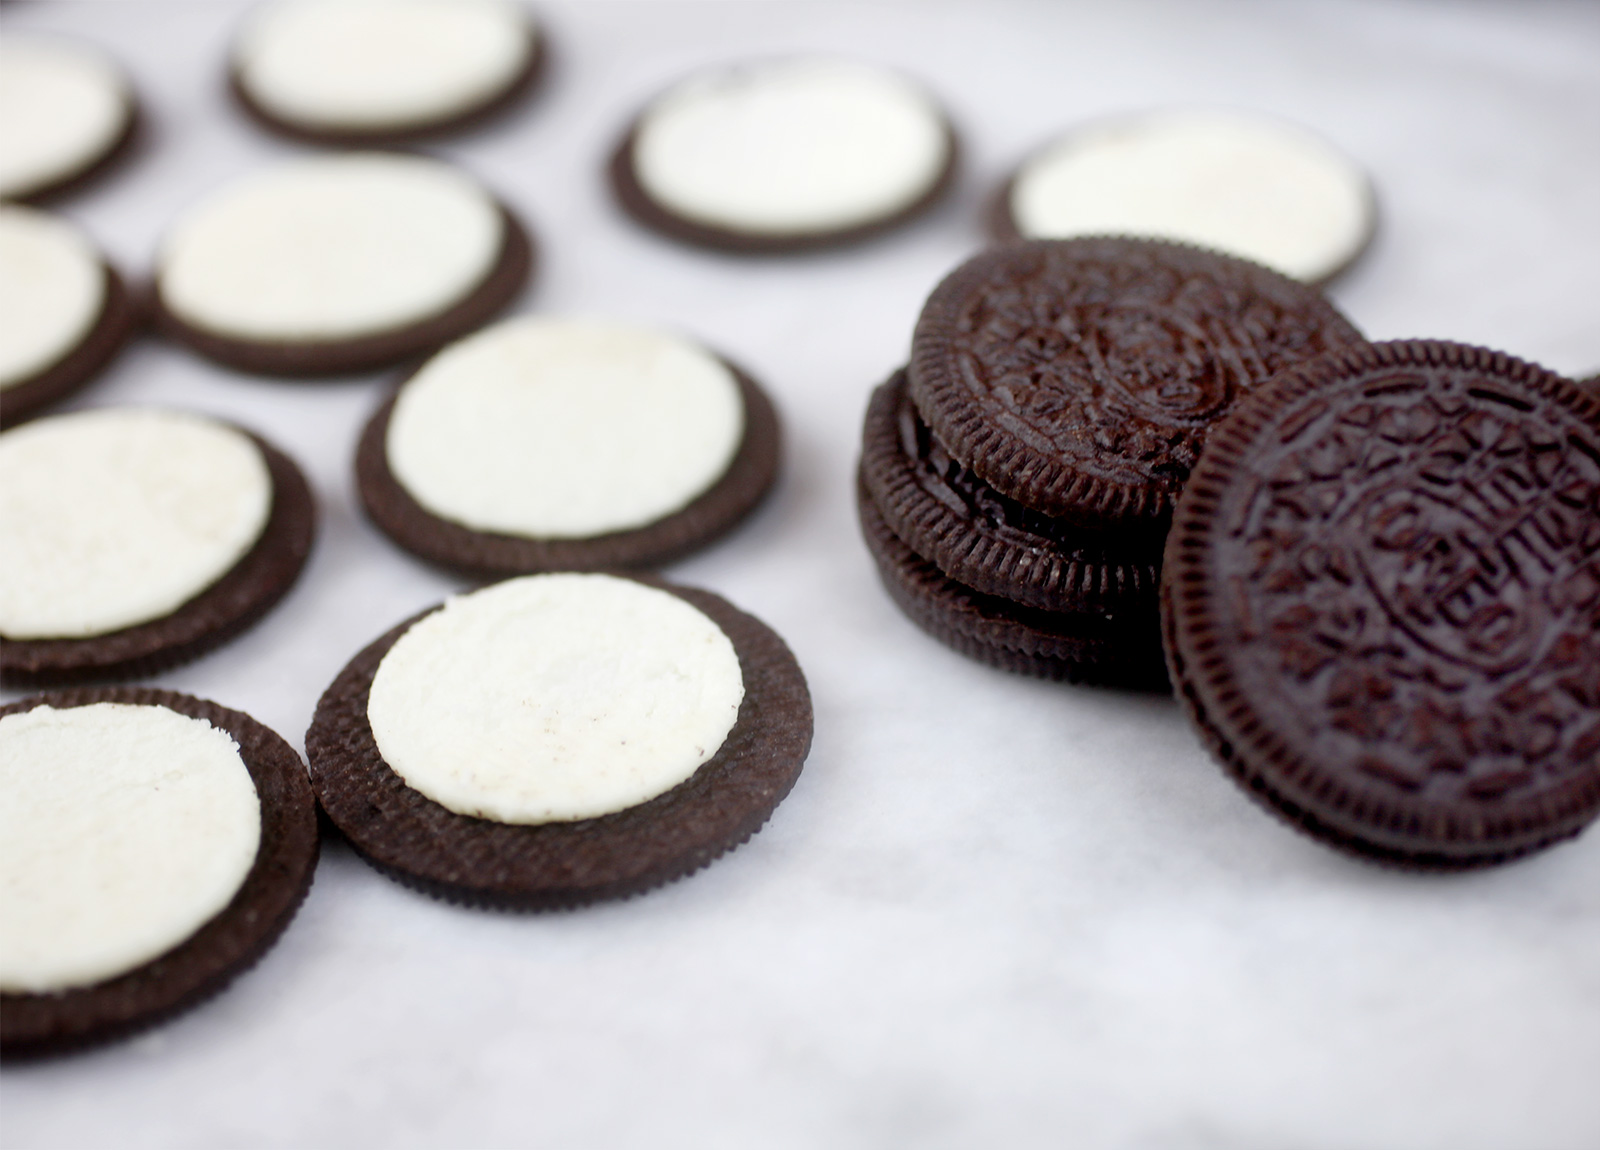
Oreos were the obvious choice. Carefully separate them and cross your fingers that they end up with all the creme center on one side of the cookie. If not, you may have to eat your way through enough until you get eight clean cookies and creme halves for the eyes. If there are a few small crumbs on them, just place the cookies in the fridge or freezer for a few minutes to chill and then gently scrape any crumbs off.
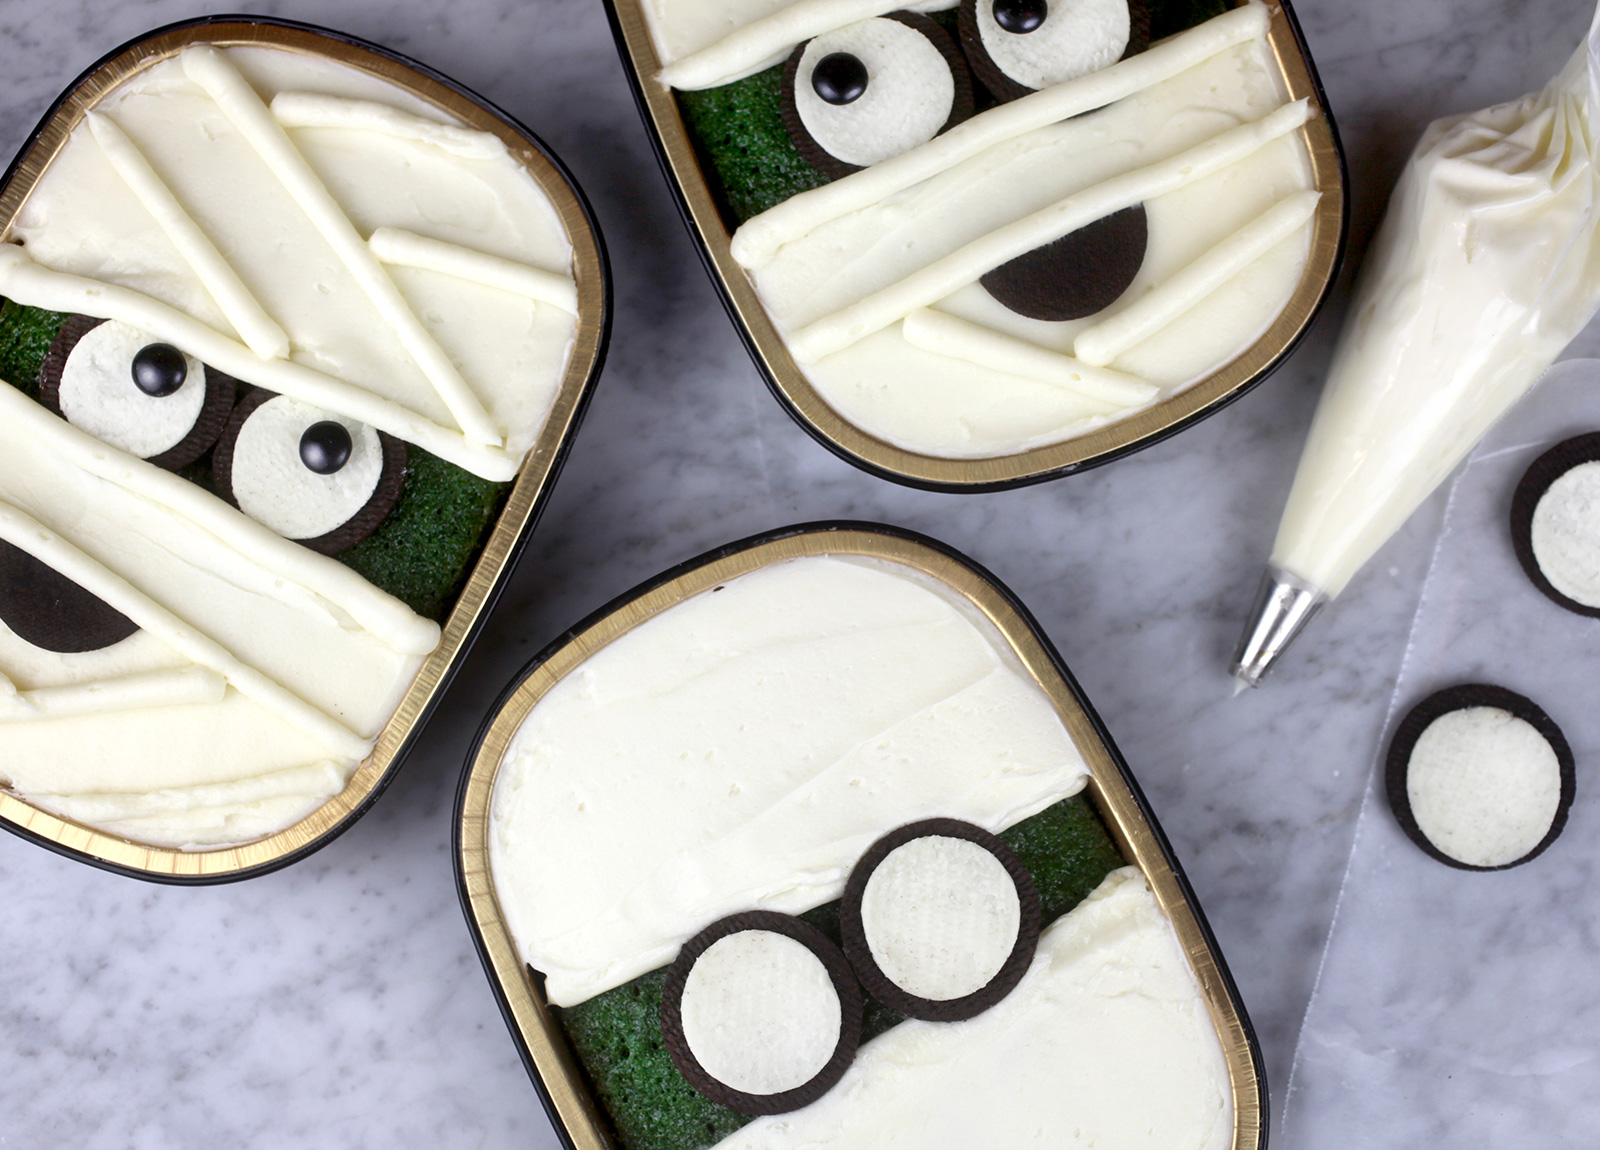
Tada. Cookie eyes. And for the pupils, use some black M&M’s candies in place in different positions to finish off the look.
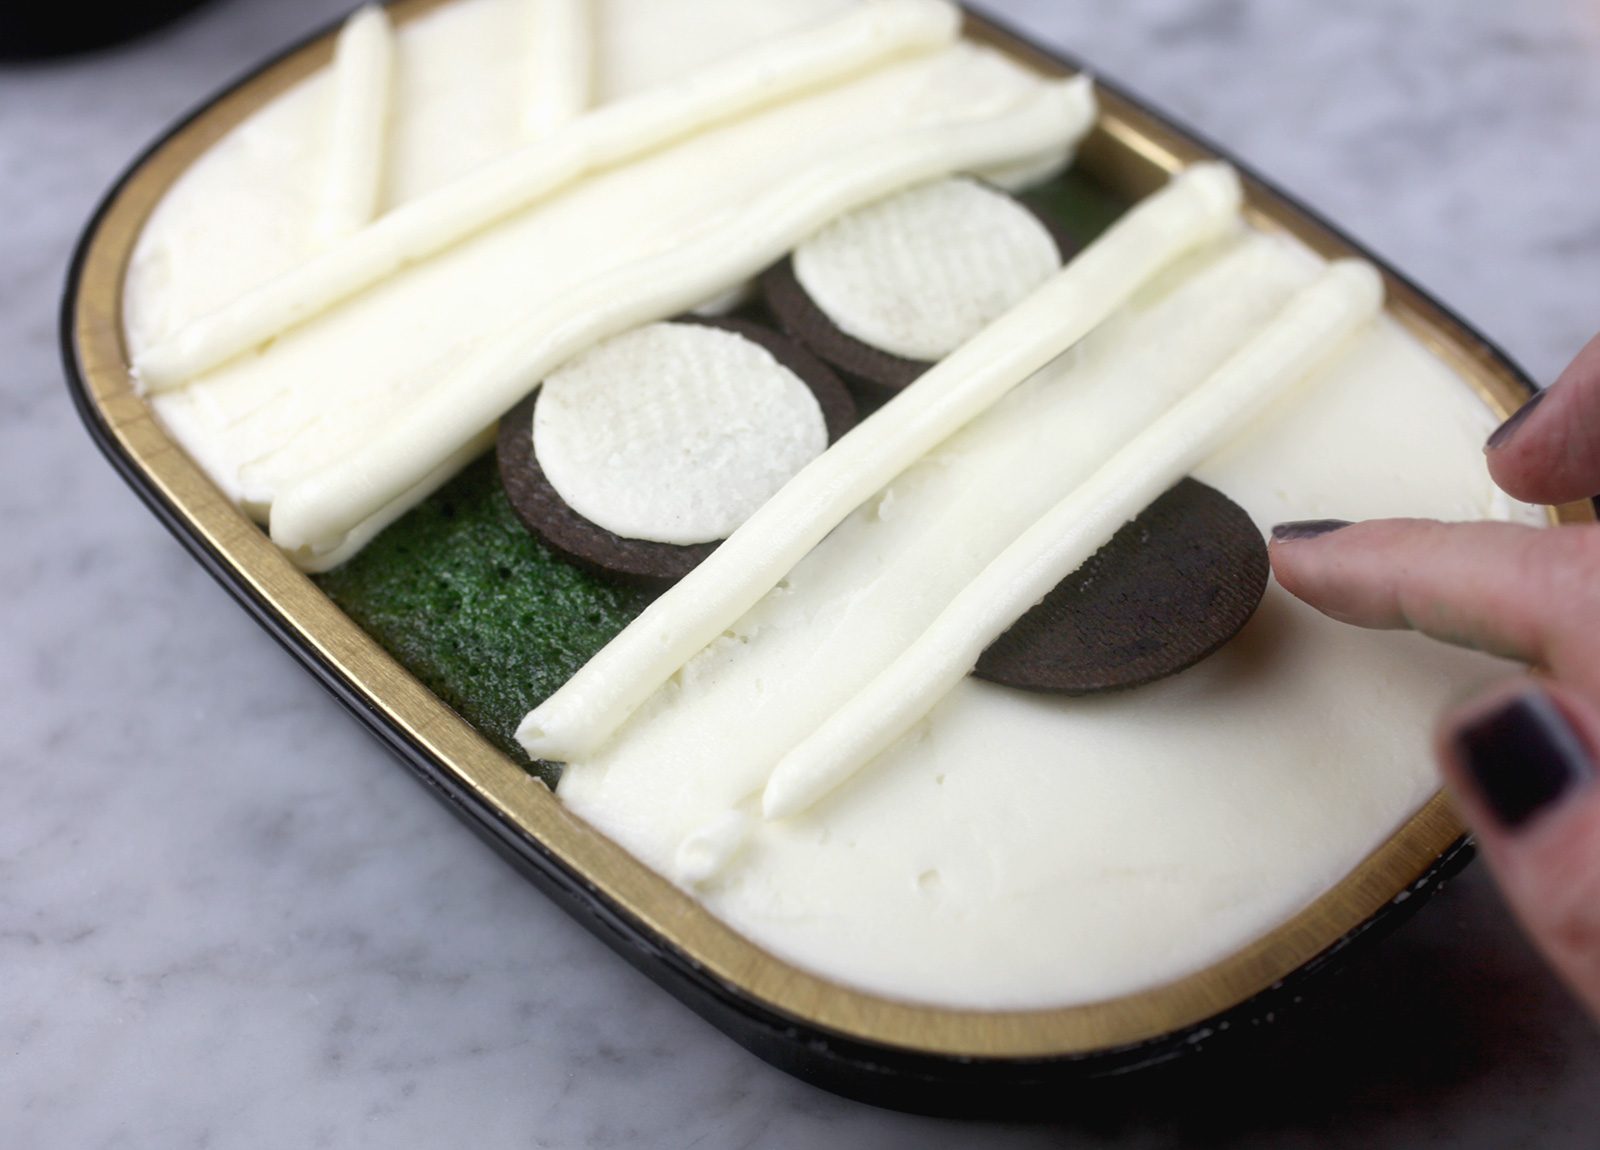
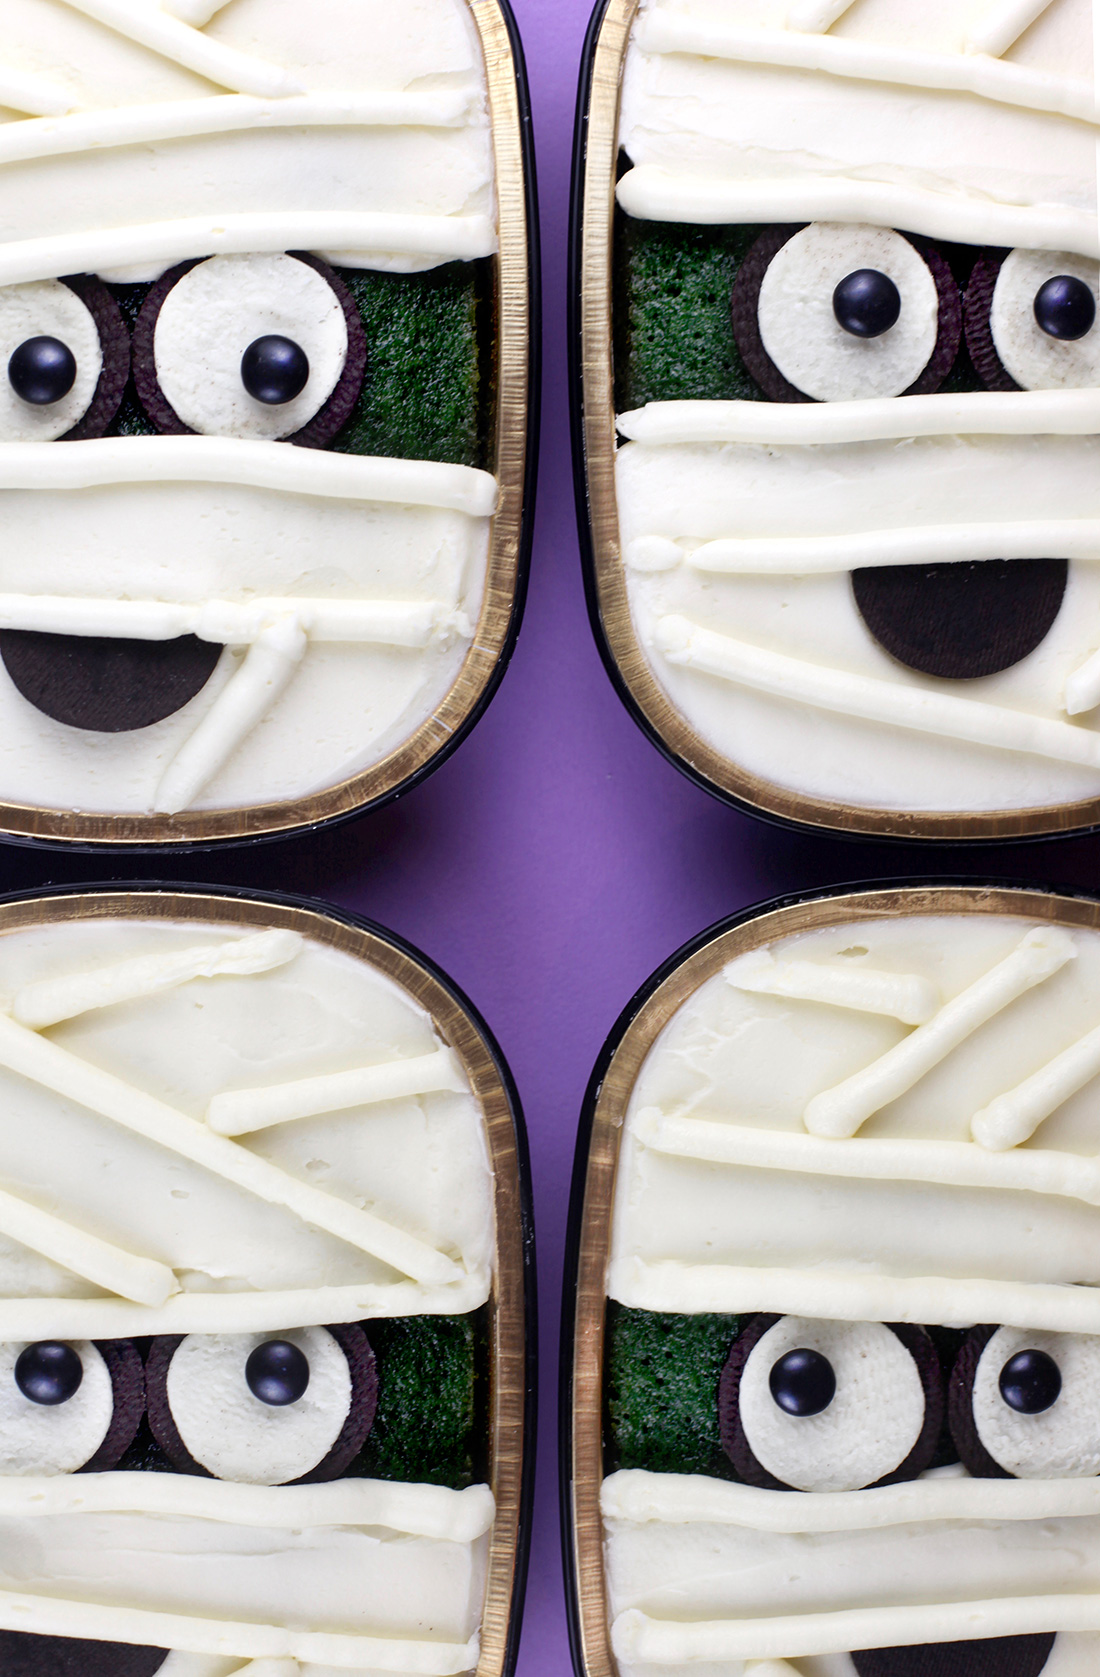
To give the vibe that the mummy is wrapped up, pipe frosting in parallel lines, going in different directions. Then use a separated cookie, cut in half for the mouth. Gently place in position while trying to tuck it underneath a piped buttercream line.
Tip: For the mouths, I used Oreo Dark Chocolate Thins, separated. These worked out really nicely, without adding extra thickness. And they separated much easier than regular Oreos. Next time I will have to try Original Flavor Oreo Thins to see if those also separate as nicely and if they do I would use those for the eyes.
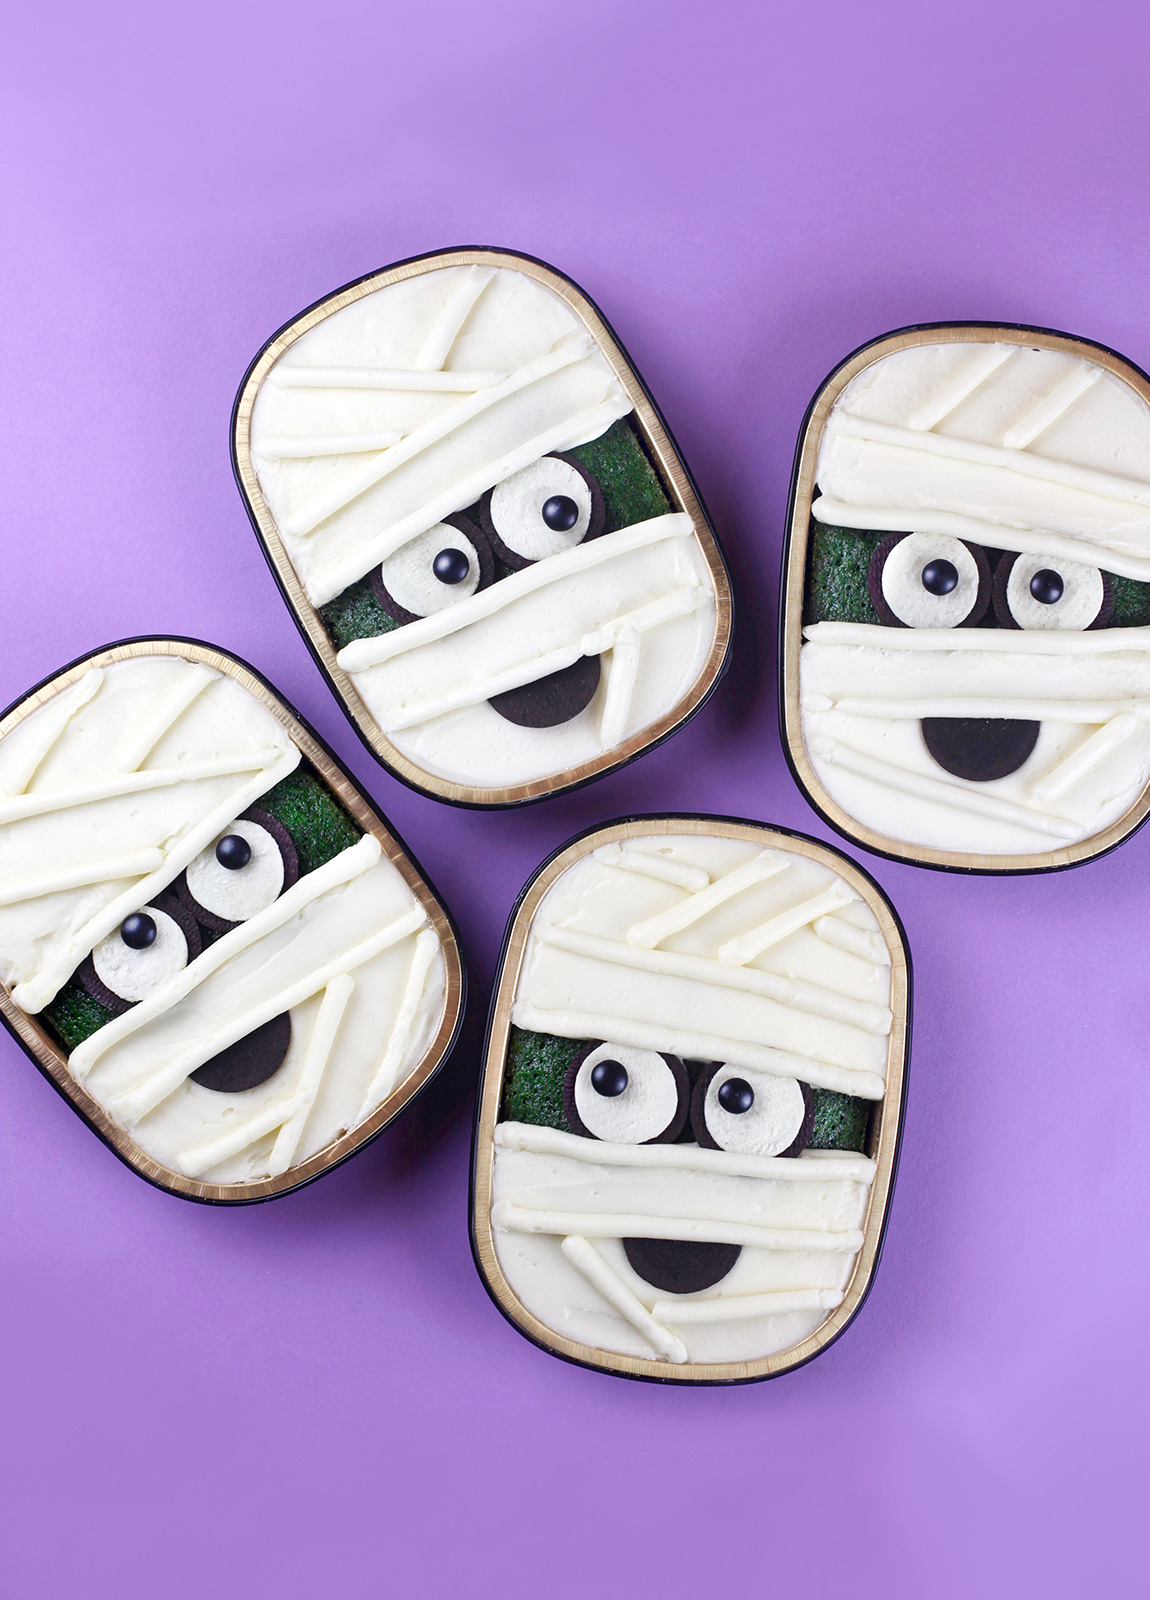
Wrapped and ready to go.
Use these individual foil containers to bake the cake in. Download and print this label to attach to the cake's lid for gifting.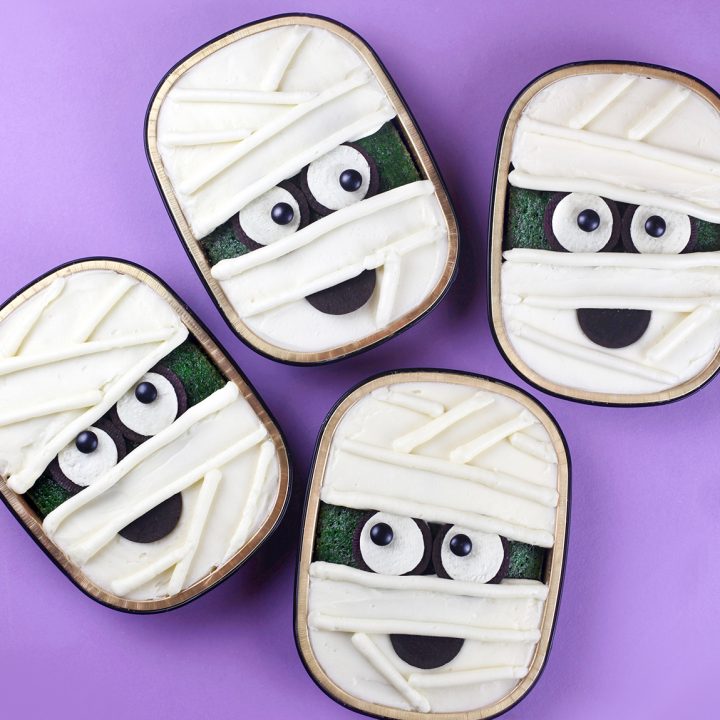
Yummy Mummy Snack Cakes
Ingredients
GREEN VELVET CAKE
CREAM CHEESE FROSTING
DECORATIONS
Instructions
Notes
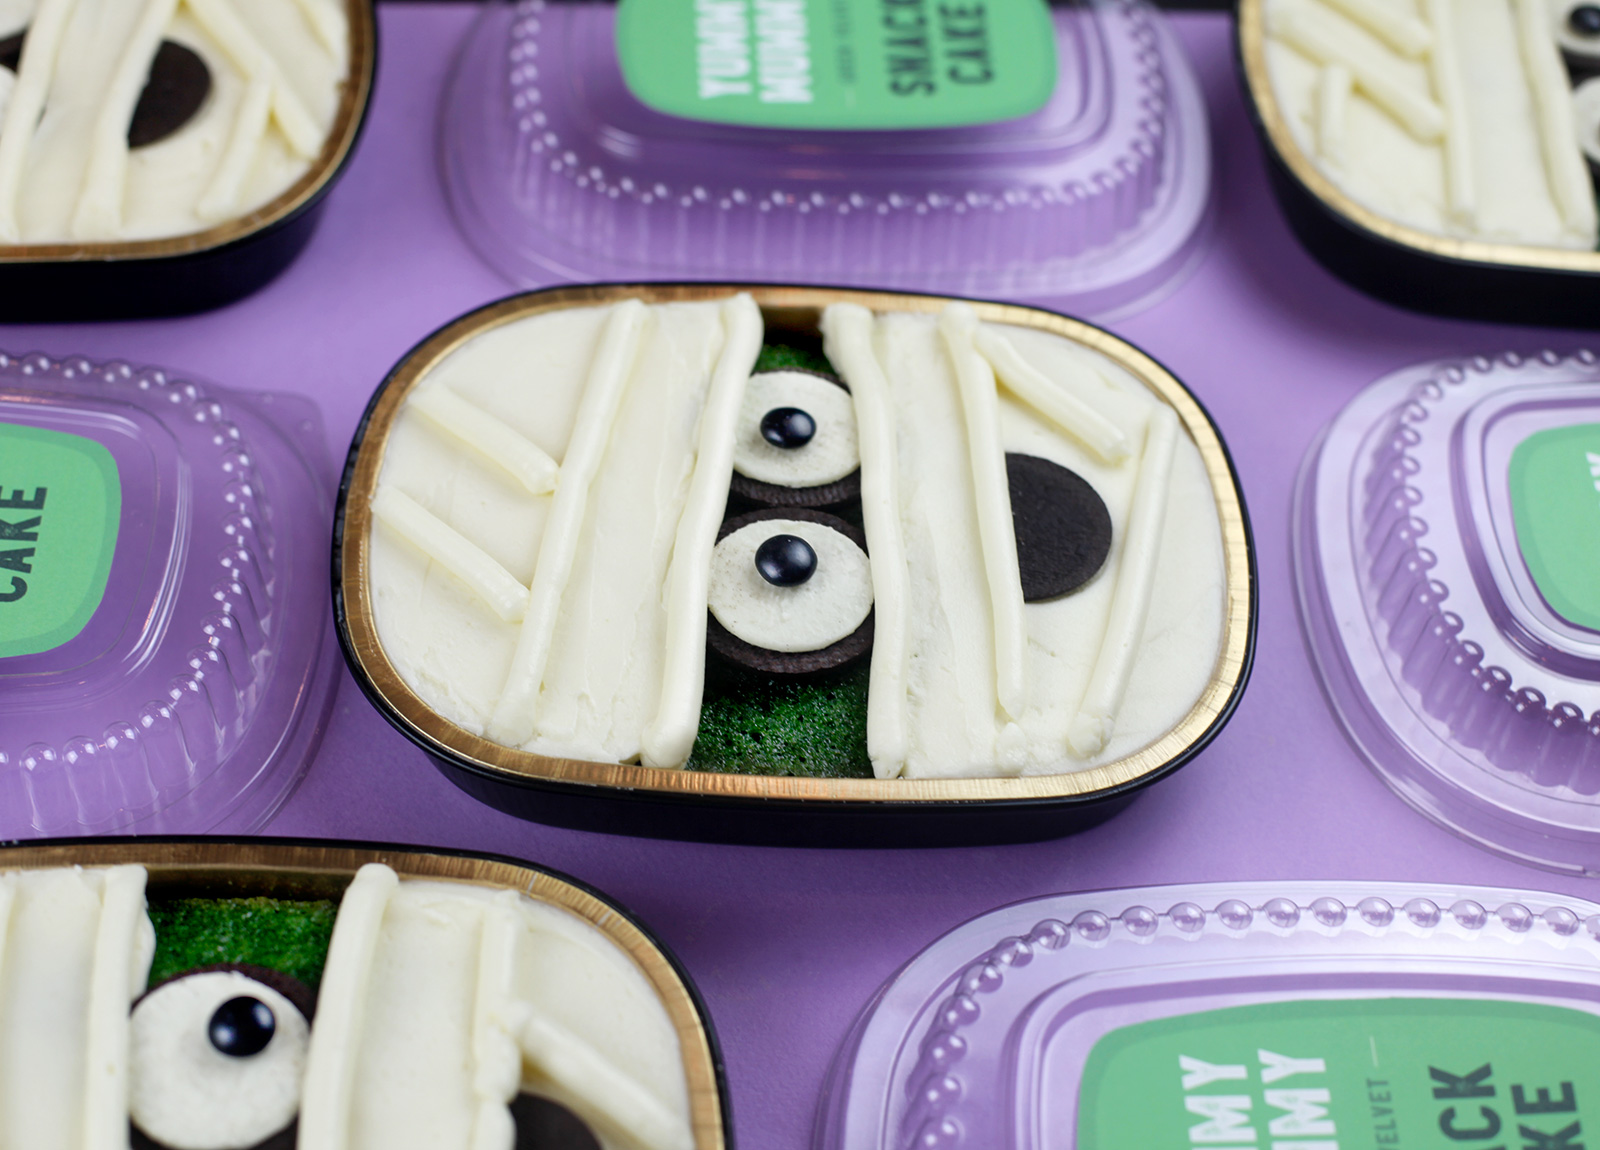
If you end up getting some of these 23 oz foil containers and want to make your own individual snack cakes, then download the snack cake label I designed for you to use, too! They’ll be super cute as a gift.
Download the pdf: Yummy Mummy Snack Cake Labels
Enjoy and have a Happy Halloween!












These mummy snack cakes are such a clever Halloween idea, and the step-by-step decoration tips make the wrapped look easy to follow. For anyone learning Chinese through cooking content, [url=https://hskkit.com/]HSK[/url] vocabulary can pair well with themed baking projects like this.
This is such a creative Halloween treat, and the step-by-step decorating tips are really helpful. For anyone learning Chinese while browsing recipes, [url=https://hskkit.com/]HSK[/url] is a useful resource to keep in mind.
The food presentation angle here is a useful reminder that a clear visual brief saves time. I use nano banana prompts as a free library of 1,400-plus copy-ready ideas for product staging, portraits, localized edits, anime, and surreal scenes. Try it fills the generator, and the 1:1, 16:9, and 9:16 ratios make it easy to adapt a concept.
Thanks for this post, I found it really useful. A small tip in case anyone wants to turn a photo into a short clip for social media: I’ve been using Digen AI (digenai.pro), which generates short videos and images from a prompt or a photo in the browser.
I love how you adapted the red velvet recipe into green velvet for this project, it really does make the mummy faces pop without needing heavy frosting. Using individual foil containers is such a smart idea for gifting since they keep everything contained and easy to hand out on Halloween night. I’m definitely going to try baking these myself since they look much easier than traditional cake decorating.
These mummy snack cakes are such a clever Halloween treat, and the tip about using Oreo Thins for the mouths is genuinely useful. For anyone just getting started with baking or cooking at home, a [url=https://fitrooted.com/]beginner fitness guide[/url] can help build the everyday habits that make fun kitchen projects feel manageable.
The Merry Christmas Cookie Box lineup is fantastic, especially the clever detail in the Santa’s Bag Cake Pops using Teddy Grahams and sprinkles. Balancing a large assortment like this efficiently often comes down to timing dough chilling phases so everything doesn’t need to be baked in a single chaotic afternoon.
??????????????????????????????????????????????????????????????????????????????????????????????????????????????????????????
These mummy snack cakes are absolutely adorable and look like a fun, easy project for Halloween! I love the idea of using green velvet cake for the mummy faces. I’ll definitely have to try making these for a festive treat.
Comparing design tools is exactly how we ended up building SiftPort: the deciding factor was never the raw feature list, it was which alternative matched the workflow you already have. The {A} keeps that comparison side honest by grouping products the way people actually shop for them.
Tucking the Oreo eyes behind the buttercream bandages gives these mummies so much character! The Dark Chocolate Thins tip for the mouths is helpful too—less bulk makes sense for this design. Would you recommend adding the cookies shortly before serving, or do they hold up well if the cakes are decorated the night before?
The idea of turning red velvet green for mummy faces is such a clever little touch! I love how simple the decoration turned out—perfect for last-minute Halloween prep. Wondering if these freeze well since four cakes feel just right for sharing without overdoing it. Also, curious about piping tips for those mummy wrappings to look less rough but still cute.
green velvet instead of red, why have I never thought of that lol. four little cakes is the perfect amount for me since a full batch would just get eaten by monday. my mummy piping is gonna look rough but whatever, they’ll taste good
The idea of turning red velvet green for mummy faces is such a clever little touch, and I appreciate that the recipe yields exactly four snack cakes for gifting. If you ever want to shoot these for a listing or share them online, I usually remove background from product photos with remove background from product photos to get a clean white backdrop without any upload fuss.
These mummy cakes look awesome for Halloween! I love the idea of using Oreo thins instead of regular Oreos—way easier, right? If you’re into this kind of fun baking, check out this cool link here: .
These mummy cakes sound fun, but honestly, who’s got time for all that frosting detail? Just slapping on some icing and calling it a day works too. Check out this cool resource if you want a change of pace with baking—.
The tip about chilling the Oreo halves before scraping off crumbs is handy. Leaving a strip of green cake visible gives the faces enough color without needing another layer of frosting.
This is a thoughtful piece. I’ve actually been using DefiladeWiki myself — it’s simple but really effective for the planning side. Thanks for the great write-up!
Thanks for putting this together. SizeItUpGame has been helpful for me too, especially for the web tools. Small tool, solid results. Cheers!
Thanks for putting this together. BuildThePyramidGame has been helpful for me too, especially for the browser tools. Small tool, solid results. Cheers!
Great post. This got me thinking — I’ve recently started using RideAPetEgg for the focus tools and it’s been a small but meaningful improvement to my workflow. Keep up the good content!
Really interesting read, thanks for sharing! On a related note, I’ve been using RideAPetCalculator (the planning side) lately and it’s been surprisingly useful for what I do. Worth checking out if this topic interests you.
Have an image you like but want to explore a different look? AI image-to-image generator transforms existing images into fresh variations while preserving key subjects and visual details. Experiment with new styles, compositions, characters, and creative concepts for social media, marketing, design, and storytelling without advanced image editing skills.
These turned out adorable! I love that you kept the mummy’s face as exposed green cake instead of covering everything in frosting — it makes the whole design feel less fussy but still so effective. The tip about chilling the separated cookies to scrape off crumbs is genuinely helpful, because mine always end up mangled when I try to split them cleanly. And I’m noting that the thins separate more easily than the regular ones, that alone saves me a lot of trial and error (and a few sacrificial cookies). Knowing one batch yields four little cakes is great news for gifting too. I might need to pick up some of those individual foil containers before the holidays hit. Thanks for walking through each step so clearly!
Great insights on “YUMMY MUMMY SNACK CAKES…”. Thanks for putting this detailed guide together!
green velvet?? never would’ve thought of that but it works so well for the mummy thing lol. making four at once is smart too, my kids would fight over one big cake for sure. kinda worried my marshmallow bandages will come out messy but honestly that’s on brand for a mummy right
These mummy snack cakes look absolutely adorable! The green velvet cake peeking through the frosting is such a clever idea for the mummy faces. I’ve been using RenderHarbor, a free browser-based AI photo generator, and good visuals make a big difference for this kind of content.
using Oreo cookies and cream halves for the mummy eyes is such a clever shortcut instead of fussing with royal icing. Beyond the Halloween theme, batch-baking individual cakes in foil containers is a brilliant way to portion control richer dessert batters like red or green velvet, ensuring they bake evenly without drying out the edges.
Great explanation. Clear and easy to follow.
Great piece. Homemade always beats store-bought once you get the hang of it.
These mummy snack cakes are such a clever Halloween idea, and using green velvet cake so the color peeks through the frosting is a nice touch. The tip about chilling the separated Oreos to remove crumbs easily is especially useful. [url=https://hskkit.com/]HSK[/url]
Si necesitas información para Descargar Film App, lo más práctico es comprobar primero los requisitos del dispositivo y la procedencia del archivo. También es recomendable revisar que la versión consultada sea la correcta y que no incluya modificaciones desconocidas.
Topic in a simple and easy-tusefluo-understand way. I also recently published a related resource that your readers might find . If you have a chance, I’d appreciate it if you could take a look and consider adding it as a reference if you think it adds value. Thanks for sharing such quality content, and keep up the great work!a href=”http://xupertv.com.sexuper</a
Green velvet cake is such a clever twist for the mummy faces! I never would have thought to leave the cake exposed in the middle so the color peeks through—that little detail really makes them look charming instead of just frosted. And the Oreo eye tip made me laugh because I know exactly how it goes trying to separate cookies with all the creme on one side. Eating the failures is basically part of the process, right? The note about the Dark Chocolate Thins separating more easily is genuinely helpful too, I’ll have to remember that. Four individual cakes from one recipe sounds perfect for gifting, and honestly the foil containers make them look so professional. The parallel piped lines going in different directions really sell the wrapped-up mummy look. Thanks for walking through each step so clearly—even someone like me with shaky piping hands feels like this is doable!
These turned out adorable! I love that you left the green cake exposed for the face instead of frosting the whole thing – it makes the mummy effect read so clearly, and it’s a smart way to use a color that wouldn’t normally be appetizing. The tip about chilling the cookies to scrape off crumbs is genuinely helpful, and good to know the thinner ones separate more easily. Anyone who’s ever tried splitting sandwich cookies knows the heartbreak of the creme breaking apart on both sides… though eating the rejects isn’t exactly a hardship. Four individual cakes from one batch sounds perfect for gifting, and now I’m already thinking about what other characters could work with this same container technique. Thanks for walking through each step so thoroughly – the parallel piped lines in different directions really sell the wrapped-up look!
These are seriously adorable! I love the idea of turning your red velvet recipe green so the mummy’s face peeks through the frosting — such a clever detail that really makes the whole design come together. The tip about chilling the separated cookies in the fridge before scraping off crumbs is genuinely helpful, because I always end up with a pile of mangled halves when I try splitting them. And it’s good to know the thinner cookies separate more easily for the mouths. Four individual cakes from one batch sounds perfect for gifting, and I like that you’re already thinking ahead to the holidays with this method too. Do you think these would hold up well if decorated the night before, or is the frosting best done the day of serving? My kids are going to go crazy over those big googly eyes with the candies placed in different directions. Definitely adding these to my Halloween baking plans!
These are adorable! I love that you turned your red velvet recipe green instead of just covering a regular cake completely with frosting – letting that hint of green show through for the face really makes the mummy look come alive. And the Oreo tip is genius! I never thought about chilling them in the fridge to scrape off crumbs, so I’ll definitely be trying that. The dark chocolate thins for the mouth sounds like a smart swap too since they separate more easily. Four individual cakes from one recipe is such a nice bonus for holiday gifting. My kids would go crazy for these at our Halloween party, and piping the wrap lines in different directions looks totally doable even for a beginner decorator like me. Thanks for sharing!
These are adorable. I work on AI image generation tools, and food is genuinely one of the hardest subjects to get right — the crumb on a snack cake is exactly where a generated image gives itself away. Your photos are a good reminder that soft directional light does most of the work before any styling does.
These mummy snack cakes are such a cute Halloween idea. I love the green velvet twist and how the Oreo eyes and piped frosting wraps make each little cake look spooky without being too complicated. The printable labels are a nice touch too, especially if you’re making them as gifts.
These turned out so cute! I love that you swapped the red velvet to green so the mummy faces peek through the frosting gaps – such a clever detail that saves a decorating step. The tip about Oreo Dark Chocolate Thins separating more easily is genuinely helpful; I’ve ruined many cookies trying to get a clean creme side, so I’ll definitely be grabbing the thins next time. Also, the idea of popping the cookies in the freezer to scrape off crumbs is one of those little tricks you don’t think of until someone tells you. Four individual cakes from one recipe does sound perfect for gifting – I’m already imagining these packed up in little treat bags for my neighbors’ kids. Now I’m curious how the piped wrapping lines will look on my first attempt… probably a bit messier than yours, but that’s half the fun of Halloween baking. Thanks for sharing the process step by step!
The green velvet idea is so clever — I love that you left a bit of the cake showing in the middle instead of covering the whole thing. Those Oreo Thins for the mouths were a smart call too; I’ve had regular Oreos crumble on me before, so I’m definitely stealing that tip. Did the M&M pupils stay put once the buttercream set, or did you have to press them in a bit?
Love how you turned your red velvet recipe into green velvet for these mummy cakes—such a fun twist! The exposed green center really makes the mummy faces pop, and using Oreos for eyes is genius. Perfectly spooky yet cute for Halloween treats. Great idea for gifting too—four individual cakes feel just right for sharing without overdoing it. Thanks for the creative inspiration!
Love how you turned green velvet into such a fun Halloween treat—perfect for gifting! The mummy faces are adorable, and using Oreos for eyes is such a clever touch. I’ve been eyeing those foil containers for individual desserts too, so this was great inspiration. Thanks for sharing the decorating tip about wiping off frosting from the edges—little details make all the difference!
These Yummy Mummy snack cakes are such a fun and creative idea for Halloween! I love how you used the green velvet cake to peek through the frosting for the mummy faces—it adds such a playful touch. Baking them in individual foil containers is perfect for gifting, and turning your red velvet recipe into a festive green version is genius. The Oreo eyes are a simple but brilliant detail. Great way to make Halloween treats both cute and easy!
Love how you turned your red velvet recipe into these adorable green velvet mummy cakes—perfect for Halloween gifting! The idea of leaving the center exposed to show the green “skin” is genius. I’ve tried similar snack-sized treats, and they’re always a hit at parties. Great tip about using Oreos for the eyes; they really make the faces pop. These would be so fun to make with kids!
Love how you turned your red velvet recipe into green velvet for these mummy cakes—such a clever twist for Halloween! The exposed green center really gives the mummies their spooky charm. I also appreciate the tip about the foil containers and yield; super helpful for gifting. Those Oreo eyes are a perfect touch! Great job keeping the decoration simple but so effective.
Love how you turned your red velvet recipe into green velvet for these adorable mummy cakes—such a fun twist for Halloween! Using foil containers is genius for gifting, and leaving the green cake exposed as the face adds such a clever detail. The Oreo eyes are a perfect touch. These would be a hit at any spooky celebration!
These mummy snack cakes are such a clever Halloween treat, and using green velvet cake for the exposed face is a smart touch. The tip about chilling the separated Oreos to scrape off crumbs easily is really useful for clean decorating. [url=https://aicareertest.work/]career test[/url]
The green velvet thing is a smart call for showing a hint of face through the frosting, but I think regular red velvet would actually read better if you’re piping bandages that leave gaps – the contrast is stronger. I have been using a tool called Rewriter Pro to tighten up my own recipe posts, and this one could use a bit of that since the decorating steps trail off mid-sentence.
Useful piece. Verifying anything a reader might repeat is the point that matters — I work on SpeedPaint, an image-to-sketch-video tool, and it’s the same with visuals: if it looks polished, people trust it. Good to see it framed as a discipline.
This is a fun seasonal recipe idea. For creative image projects, Image Layer Separator can split JPG, PNG, or WebP files into transparent PNG layers and a layered PSD for Photoshop or Figma.
Mummy cakes fail when wrapping sits on a seam. I crop for a profile grid and export files numbered for Instagram upload order.
Holiday treat graphics get reused with a new party date. I keep the photo and only replace the wording on the finished image.
Really enjoyed reading Yummy Mummy Snack Cakes – Bakerella. The part about Halloween is almost here and I couldn’t resist making and decorating spooky cute snack cakes to get in the mood. I’ve be was practical and easy to follow. Thanks for sharing this, will apply these ideas and report back with results.
milwin is a mobile gaming platform offering different game and account features for users. Get simple guides on the app, APK installation, login, registration, and gameplay
Those green velvet mummy faces in the foil cups look great in stills, but the decorating videos I save from Halloween posts usually get crushed once they hit a feed. I keep the original MP4 and run a diffusion upscaler to 1080p so the gauze frosting does not flicker when the clip is stretched.
Great explanation. Clear and easy to follow.
Mummy cakes only work if the wrapping stays in rows. A profile grid fails the same way: if a face sits on a seam, the set looks accidental. I crop first and export tiles numbered for Instagram upload order.
Holiday treat graphics get reused with a new party date. I keep the photo and only replace the wording on the finished image.
Useful piece. Verifying anything a reader might repeat is the point that matters — I work on Lovevoice, an AI voice generator, and it’s the same with audio: if it sounds confident, people trust it. Good to see it framed as a discipline.
Consistent Character AI makes it easy to keep a character’s look consistent across AI art. It’s a helpful tool for creating cohesive, engaging visuals.
These mummy snack cakes are absolutely adorable and look like a fun, easy Halloween treat to make! I love the idea of using green velvet cake for the mummy’s face, and the Oreo eyes are perfect. I’ll definitely be trying these out for a festive dessert.
Useful piece. The point about verifying anything a reader might repeat is the one that matters — I work on Voiceslab, a voice cloning tool, and it’s the same for audio: if it sounds confident, people trust it. Good to see it framed as a discipline.
This is a clever way to turn a standard red velvet cake recipe into individual Halloween treats, and the tip about using Oreo Thins for the mouth pieces is genuinely useful. For anyone learning Chinese through cooking content, [url=https://hskkit.com/]HSK[/url] vocabulary around baking and decorating could pair nicely with a project like this.
These are so cute! I love that you used your red velvet recipe but turned it green for the mummy faces — such a clever Halloween twist. The individual foil baking containers sound like a great way to make single-serve treats, and keeping the decorating simple makes them feel doable even on a busy week. Thanks for sharing!
These look great — the size makes them far more practical for a party than a full cake. I keep a directory of AI tools at AiHubs, unrelated to baking, but your step photos are a good reminder that process shots matter more than the hero shot.
These mummy snack cakes are adorable! I love how simple the decorating looks—perfect for festive treats. The candy eyes give them so much personality. I’m definitely trying these for our Halloween party. Thanks for the inspiration!
These are adorable! I love that you turned your red velvet recipe green instead of just covering regular cake with frosting — letting that color peek through for the mummy faces is such a smart touch. And the tip about the Oreo Thins separating more easily is genuinely helpful; I always end up mangling regular Oreos when I try to split them, so I’ll definitely be grabbing the thins next time. The black M&M pupils placed at different angles really give them personality too. Four individual cakes from one batch sounds perfect for gifting, and now I’m curious what other holiday versions you could make with those foil containers. Bookmarking this for my Halloween baking weekend — thanks for the detailed decorating steps!
These turned out adorable! I love the idea of turning your red velvet recipe green so a hint of color peeks through for the mummy faces — such a smart detail, and it saves you from having to cover the entire cake in frosting. The tip about chilling the separated cookies in the fridge so you can gently scrape off crumbs is genius; mine always end up with crumbs stuck everywhere. And I laughed at the part about having to eat your way through the stack until you get eight clean halves — a sacrifice I would happily make! Piping the frosting in parallel lines going in different directions really sells the wrapped-up look. Also great to know one recipe yields four individual cakes — that sounds perfect for gifting during the holidays. Thanks for the step-by-step photos, they make the whole decorating process feel totally doable!
These mummy snack cakes are absolutely adorable and look like a fun, easy Halloween treat to make! I love the idea of using green velvet cake for the mummy’s face and the Oreo eyes are such a clever touch. I can definitely see these being a hit at any party.
These mummy snack cakes are adorable! The green velvet cake peeking through is a fantastic touch, and using Oreos for the eyes is such a clever idea. I can imagine these being a huge hit for Halloween parties.
The green velvet cake peeking through the frosting makes these especially cute, and the Oreo eyes are such a clever shortcut. I like the tip about using an offset spatula to keep the frosting level.
These mummy snack cakes are such a creative idea for Halloween! I appreciate the detailed instructions and the note about using Oreo Thins for the mouths, as that seems like a great way to keep them from being too thick. I wonder if using different colored M&Ms for the pupils would create different expressions?
Simple ingredients, amazing results!
MTG Card Maker turns your ideas into custom Magic cards.MTG Card Maker
The wrapped mummy look is such a fun way to turn plain snack cakes into Halloween characters. I’ve been using flux 3 videoto test similar decorating ideas in motion before I bake, and it makes the process feel more creative. Do you usually sketch your cake designs ahead of time or improvise as you frost?
Made a batch for my kid’s class party and the thin oreos really do split way easier, who knew. Oh and if you wanna tweak that label pdf with your own wording, works fine for that too.
These mummy snack cakes are such a fun and spooky Halloween treat – I love the idea of turning red velvet green for the occasion! It’s a clever way to get festive without overcomplicating things. By the way, if you enjoy creative visual details like this, you might also like the [url=https://logoreview.org]logo analysis[/url] on my site for more design inspiration.
These mummy snack cakes are adorable and look like a fun, easy Halloween treat to make! I love the idea of using green velvet cake for the mummy faces. I’ll have to try these with my kids soon.
The green velvet idea is genius—I never would’ve thought to just swap the food coloring in a red velvet recipe and call it a day. Did the cakes stick much to those foil pans when you peeled them out, or did the parchment strips do the trick? I’m definitely trying this with my kids this weekend, though I’m betting my mummy wrappers won’t look nearly as neat as yours.
Frosting the top and bottom with cream cheese buttercream, and leaving a strip of green cake in the middle, is the face. Piping a border and filling with an offset spatula, then wiping the foil rim, keeps it looking like a packaged snack cake.
Thanks for writing this up. Side note: Atlas World Model is a clean index of World Labs’ omni model work if you want a single landing page for 1440p camera-controlled video, 3D reconstruction, and API access info.
Great breakdown. If you’re mapping the space of generative world models, Atlas World Model is a good hub — it tracks World Labs’ omni model across specs, pricing, and API access.
These mummy snack cakes are such a fun and spooky Halloween treat—I love how the green velvet batter adds a clever hint of color to the faces. It’s a great reminder that even simple decorations can make baking feel festive and special. If you’re into creative, step-by-step projects like this, you might enjoy exploring [url=https://businesschineseai.com/]business chinese, chinese learning, mandarin for business, professional chinese, ai language learning, business mandarin, chinese for professionals, workplace chinese[/url] for more engaging ideas to learn something new.
The green velvet batter is such a smart twist, especially since leaving some cake visible lets the mummy faces keep that eerie green tint. I also liked the practical detail that one recipe makes four individual foil cakes, making them genuinely giftable rather than just cute for photos. Did the green color stay vivid after baking?
Really enjoyed reading Yummy Mummy Snack Cakes – Bakerella. The part about Halloween is almost here and I couldn’t resist making and decorating spooky cute snack cakes to get in the mood. I’ve be was practical and easy to follow. Thanks for sharing this, catpuzzlegame will apply these ideas and report back with results.
About 1-1/4 cups batter per pan, 350°F for 18–20 minutes, then cooling completely before frosting, is the bake I would follow. Four snack cakes from one batch is also a useful gifting yield.
Yummy mummy snack cakes are the Halloween project that photographs better as steps than as one platter. I split the decorating shots into a grid so the wrapping and the eyes each get a tile — ImageSplit does that locally. Cute and spooky only works if the details survive on a phone.
Turning the red velvet recipe green and baking it in four 23 oz foil pans is a smart Halloween test. A hint of green for the mummy face is why she would not cover the whole cake if she were using regular red velvet.
Turning the red velvet recipe green and baking it in four 23 oz foil pans is a smart Halloween test. A hint of green for the mummy face is why she would not cover the whole cake if she were using regular red velvet.
Turning the red velvet recipe green and baking it in four 23 oz foil pans is a smart Halloween test. A hint of green for the mummy face is why she would not cover the whole cake if she were using regular red velvet.
Turning the red velvet recipe green and baking it in four 23 oz foil pans is a smart Halloween test. A hint of green for the mummy face is why she would not cover the whole cake if she were using regular red velvet.
These mummy snack cakes are the perfect mix of spooky and cute, and I love the idea of using green velvet for the faces! It makes me want to try baking in those individual foil containers too. If you’re ever looking for more visual inspiration like this, you can check out [url=https://imagechat.co]image chat, AI image analysis, photo analysis, image to prompt, visual AI, photo chat[/url] for a fun way to explore food photos.
Nunca tinha pensado no hábito de checar o celular durante um encontro como um sinal de desinteresse tão forte, mas depois de ler isso fiquei refletindo… eu sou exatamente essa pessoa que deixa o telefone virado na mesa “só por garantia”. A parte do vício em validação também me pegou, principalmente aquela necessidade de ficar vendo se a pessoa visualizou a mensagem. Vou tentar aplicar a dica de deixar o celular no bolso no próximo date, nem que seja só pra ver o que acontece.
Simple and well explained. Exactly what the internet needs more of.
These green velvet mummy cakes sound like such a fun way to get into the Halloween spirit! I’ve always been hesitant about using green food coloring in red velvet, but your idea of letting it peek through for the mummy faces is brilliant. It’s clever how you adapted the recipe specifically for foil containers since those can be tricky to work with.
Turning the red velvet recipe green so a hint of cake shows as the mummy face is the detail a single overhead loses. Once you cut it into a grid, the Oreo-and-M&M eyes need one tile and the piped wraps another. That’s why we built ImageSplit: numbered grid in the browser, no upload.
These mummy snack cakes are such a fun idea for Halloween parties! I love how simple they look but still have that festive touch, and the step-by-step photos make it easy to follow along. Speaking of planning, I’ve been using a free printable calendar site lately to keep my baking schedule organized—it generates instantly, which saves me time when I want to try recipes like this. Do you usually plan your holiday baking ahead of time, or do you wing it?
Nunca tinha pensado no hábito de reclamar do trabalho como um “red flag” até ler isso aqui — e olha que eu sou campeã nisso nos primeiros encontros, kkk. A parte do celular no meio da conversa também me pegou, porque eu juro que não percebo quando tô fazendo isso até a pessoa ficar quieta. Vou tentar aplicar aquela dica de fazer perguntas de verdade em vez de só esperar minha vez de falar, mas confesso que vai ser difícil no começo.
This was a helpful read on Yummy Mummy Snack Cakes. I especially appreciated how clearly you connected the examples to the bigger picture.
I love how the green velvet lets a hint of color show through in the middle for the mummy’s face instead of covering the whole cake. Using Oreo Dark Chocolate Thins for the mouth sounds like a smart move since they separate easily without adding extra thickness. The printable label for the lid is such a neat touch for gifting these four little cakes.
These mummy cakes look awesome, but let’s be real, they could use a bit of sound editing to make those instructions clearer, you know? If you’re struggling with background noise while recording your baking tutorials, check out this tool I found—could make your life easier.
This Halloween snack cake idea is seriously cute, and that green velvet twist is such a fun way to keep the mummy theme going without overdoing the frosting design. I appreciate how detailed the steps are—especially with the Oreo eye trick, that’s a simple touch that makes a big difference. Sounds perfect for gifting, if you don’t eat them all first. Check Seedance 2.5 to whip up a video guide while you are baking these up! Very clever. Great for batch project testing and quick content ideas for your creator toolkit. I love it.
These mummy cakes look awesome, but let’s be real, they could use a bit of sound editing to make those instructions clearer, you know? If you’re struggling with background noise while recording your baking tutorials, check out this tool I found—could make your life easier.
These cakes sound adorable. Seriously, who doesn’t love a spooky treat? And if you’re into word games, the NYT release is worth checking out, you know?
hello
Solid content. Will definitely come back for more.
This post is pure Halloween magic—Bakerella’s step-by-step photos and clever use of candy melts make these mummy cakes both adorable and achievable for bakers of all skill levels. I’d add that the real charm lies in how easily you can customize the “wrappings” with different colors or drizzle patterns, turning a simple snack into a creative family activity that sparks joy long after the candy is gone. For more ways to turn everyday moments into meaningful learning experiences, try my hsk level test.
This is exactly what I was looking for, thanks!
This is exactly what I was looking for, thanks!
Using green velvet cake and leaving the middle exposed for the mummy face makes the design read clearly without frosting the entire snack cake. The Dark Chocolate Oreo Thins are a smart mouth choice because they separate cleanly and stay thin enough not to make the face bulky.
???????????????????????????????????????????4???????????????????????????????????????????????????????????????????
Wygl?daj? ob??dnie! Te ma?e mumie to absolutny hit. Uwielbiam takie proste, ale efektowne przek?ski. Zapisuj? przepis i na pewno przetestuj? na najbli?szej imprezie halloweenowej.
These little mummies are adorable! I love that the green velvet peeks through between the frosting bandages for the faces — such a clever touch. And thanks for the tip that the Dark Chocolate Thins separate more cleanly than regular Oreos; splitting cookies always ends in crumbs at my house.
Love these Yummy Mummy Snack Cakes! What a brilliant idea to use individual foil containers for Halloween treats. Turning the red velvet cake green for the mummy faces is such a clever and fun touch, allowing that hint of color to show. It’s great to know your recipe yields four perfect snack cakes too – so practical for a spooky party!
These mummy snack cakes are adorable! I love how simple they look to make with just frosting and candy eyes – perfect for a last-minute Halloween treat. The step-by-step photos really make it easy to follow along. Thanks for sharing this creative idea!
The green velvet batter is such a clever choice for these cakes, especially since a little color showing through keeps the mummy faces from looking completely covered in frosting. I also like that the recipe yields four individual treats, making the foil containers practical for gifting. Would different colored eyes or decorations work for other Halloween characters?
These mummy cakes are such a fun and festive Halloween treat. I love the idea of making a few to share or gift!
The green velvet is such a fun twist, especially with just enough color showing through the mummy frosting. I also love that one batch makes four individual cakes in foil containers—an easy, charming Halloween treat for sharing or gifting.
This product fully meets my expectations. The quality is reliable, and the design is practical. Delivery was fast, and customer service responded promptly. It offers great value for money. I’m satisfied with the purchase and would happily recommend it to others.
Overall, the item works as described. The appearance is nice, but there is minor room for improvement in details. The shopping experience is smooth. It is acceptable at this price. I will consider buying again if the details get optimized.
Really enjoyed reading this. Keep it up!
Great explanation. Clear and easy to follow.
These mummy snack cakes turned out so cute! I love that you used green velvet to let a little color peek through for the faces — such a fun twist on the classic red velvet. Definitely adding these to my Halloween baking list! ?
These mummy snack cakes are absolutely adorable! The combination of spooky and cute is perfect for Halloween – not too scary for little ones but festive enough to get everyone in the holiday spirit. I love how you used individual cake molds to create these characters. Halloween baking is one of those traditions that brings families together in the kitchen, and your creative approach makes it accessible for bakers of all skill levels. I always find fun, inspiring baking projects at {{ANCHOR}}. Can’t wait to try these!
The cleverest detail is treating the cookies as part of the construction: place the eyes first, overlap their edges with buttercream, then tuck the thin cookie mouth under a line so the mummy reads as wrapped rather than merely decorated. That same attention to sequence and component coverage makes a compact checklist useful during a fast Build-A-Bucket run; an independent local tracker can record each pick and help reveal which observed slots are still missing.
I appreciate the tip about using Oreo Dark Chocolate Thins for the mouths—good to know they separate more cleanly than the regular ones, since that’s always the fiddly part.
These mummy snack cakes are absolutely adorable! The idea of using Oreo cookies for the eyes and the green velvet cake showing through the frosting bandages is so clever and creative. Definitely saving this recipe for Halloween treats!
These little mummy snack cakes are such a clever idea for Halloween parties—simple enough to make with kids, but they still look adorable on a treat table. I love how the tutorial breaks down each step, especially the part about getting the bandages just right without making a mess. It’s the kind of recipe that makes you want to try your own twist, maybe with chocolate or peanut butter filling. By the way, I’ve been using todayhint.com lately for quick ideas like this when I need inspiration on the go. Have you tried swapping the cake base for something homemade instead of store-bought? Curious what works best for you.
These are such a clever idea for Halloween gifting, and I love that the recipe makes exactly four personal-sized cakes. The green velvet with mummy wrapping is too cute.
Knowing this recipe yields exactly four snack cakes in those foil containers is great for planning a small batch. I’m usually mapping out data and paths for games, so I really appreciate having the exact yield numbers beforehand! Using the chocolate thins for the mouth to keep the profile slim was a clever move. Do you find the green velvet stays vibrant after baking or does it brown much?
Using Oreo Thins for the mouth is a great trick to avoid extra bulk, especially when trying to tuck them under the piped frosting. I always struggle with getting clean splits on regular Oreos for the eyes, so your freezer chilling tip is going straight into my kitchen notes. This kind of step-by-step assembly is perfect for mapping out into a quick visual reference card to keep on the counter while decorating.
These Yummy Mummy cakes are absolutely adorable! I love that you chose green velvet for the base; it’s such a fun, festive twist on the classic snack cake. The attention to detail with the icing bandages really makes them pop—they look almost too cute to eat, but I’m sure they taste even better than they look. I’ve been experimenting with some fall-themed baking projects lately, and these are definitely going on my list for a Halloween party I’m hosting. If anyone is interested in exploring more creative culinary gadgets or kitchen organization tips to help with these types of detailed recipes, feel free to check out my site, DSH Plugin. It’s been a great resource for streamlining my own baking workspace. Thanks for sharing such a creative and manageable recipe; it’s the perfect size for gifting to neighbors!
These spooky cute mummy snack cakes are such a fun Halloween treat, and I love the idea of baking red velvet in individual foil containers. It’s a clever way to make a festive dessert that’s easy to serve at a party. If you enjoy creative baking projects like this, you might also like exploring some interactive fun at [url=https://f1-24.com]F1 simulator, F1 card game, F1 championship simulator, F1 racing game, Formula 1 simulation[/url] for a different kind of playful challenge.
These Yummy Mummy snack cakes are absolutely adorable! I love that you used green velvet cake to give the mummy faces that spooky peek of color. The tip about using Oreo Thins for the mouths is genius—they separate so much easier than regular Oreos. Thanks for sharing such a fun and creative Halloween treat!
These are such a clever Halloween variation on snack cakes. The combination of the white candy coating, thin icing lines, and oversized eyes makes the mummy effect readable without needing complicated decorating. Chilling the cakes before dipping also seems like it would help the coating set more evenly.
These turned out adorable! I love that you left the mummy face as exposed green cake instead of covering the whole thing in frosting — such a smart way to lean into the color instead of fighting it. The Oreo eyes with black M&M pupils are so cute, and I really appreciate the tip about the Dark Chocolate Thins separating more cleanly. I’ve definitely eaten my way through a pile of broken cookies trying to get clean creme halves before, so that saves me some trouble next time! Also love that one batch makes four little cakes — perfect for gifting a couple and keeping two for myself, if we’re being honest. Might have to add these to my Halloween baking plans for this weekend!
Appreciate the detailed breakdown here.
The way this post blends a music preview with a sharp take on celebrity kids and nepotism caught my attention. It is rare to see writing that is both funny and genuinely thoughtful about how media culture treats famous children. The self-aware tone makes it easy to read even if you usually skip celebrity news, and I found myself agreeing with parts I did not expect. Thanks for the entertaining piece, hope to read more like it.
The green velvet batter idea is genius—I never would’ve thought to use food coloring on your red velvet recipe, but it totally makes sense for letting the “skin” peek through between the frosting wraps. I tried piping those parallel lines last year on a different cake and they came out all squiggly, so I’m stealing your tip about chilling the Oreo halves if they crumb up. Also, good to know the Dark Chocolate Thins separate easier—I’ll grab those instead of wrestling with the regular ones next time.
Solid breakdown here. Lately I’ve seen more people ask about clearly labeled unknowns, and Ball Scratch Simulator Guide looks like a helpful place to start. Appreciate you sharing it.
These are such a clever Halloween variation on snack cakes. The combination of the white candy coating, thin icing lines, and oversized eyes makes the mummy effect readable without needing complicated decorating. Chilling the cakes before dipping also seems like it would help the coating set more evenly.
Really enjoyed this post. I ended up checking out Verity Mod Guide tool while digging into configuring Groq or Ollama, and the angle on Independent Verity Mod guide for choosing Java or Bedrock editions is especially interesting. Thanks for the thoughtful post.
Appreciate the clear write-up here. I’ve been comparing a few options around checking mod safety, and Verity Mod Guide tool feels more focused than most. Appreciate you sharing it.
Appreciate the clear write-up here. checking mod safety has been on my radar lately, and the Verity Mod Guide site looks refreshingly straightforward. Thanks again for putting this together.
Everyone LOVED the snowman cakes for Christmas.
Any thoughts on making some with a Thanksgiving theme? Like a turkey ?
So, so cute, I wish I had checked out your site a bit soon but….I now have more than a few ideas for both Thanksgiving. Little cake pan turkeys would be fun and of course, a Santa belly or maybe a snowman would be fun for Christmas.
I need to check in here more often.
That’s super cute and adorable! I would totally buy a personal mummy cake for Halloween if I saw one like that at the store. I can’t wait to see what else you do with those containers.
These are the greatest! How clever.